Natural Bushcraft - The True Spirit of Bushcraft

  • Increase font size
  • Default font size
  • Decrease font size
Home Bushcraft Kit / Reviews Making a Wood Burner Stove using a Gas Bottle

Making a Wood Burner Stove using a Gas Bottle

E-mail Print PDF

Gas Bottle Wood Burner / Stove

How to recycle an old gas bottle into a wood-burner and cooker

This is a on going project that I will probably spend a couple of months doing, please check back here frequently as I will update this page with my latest progress. I would like to use an old recycled gas-bottle to make an efficient woodburner and cooker for as cheaply as I can. If the project goes well and it works, I will probably sand the whole thing and they spray paint it black using exhaust paint.
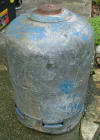
old gas bottle

Project Materials

Im using an old gas-bottled which was dumped at our local reservoir. I decided to help the country-side and myself by recycling this piece of kit and see if I could make good use of it. Its always satisfying when materials for projects come free. The bottle looks a similar design to the one displayed on the right, just a bit older with a lot less paint.


Gas Bottle Specs

- 50cm High
- 100cm Circumference
- 30cm Diameter
- 17.5KG Weight

The tank is now fully vented and depressurised! I've filled it with water to fully ensure all gas has been displaced.


Initial Design Ideas

gas bottle wood burner pencil drawing diagram stove planAfter running a few design ideas through my mind, this is the main one that im contemplating at the moment. Basically keeping the main shape of the gas bottle and utilising its original stand.

Now my drawing isn't the best as you can see so everything's not quite to scale, I think the air-intake pipe will be a lot smaller in comparison to the diagram's scale. A basic door will be cut into the front with a number of hinges, not sure what type yet. I will try to keep the door as air tight as possible. (You can click the image to enlarge it.)

A hole cut and then a good chimney with a bent neck welded on. The top of the bottle will be cut-off and a large, thick metal plate will be used as a hot-plate, possibly a disc-brake will be used for this, I'll have to see what I can scavenge. This hot-plate can then be used for cooking, with a pan on the go we'll have sausages cooked in no time!

The idea with the bottom 'adjustable air-intake' will be to control the strength and heat of the burn. I will try to keep the unit as air-tight as I can, the door will be the main challenge. The air intake will quite simply be a pipe with four or five holes drilled in, and then a larger hole on the outside with some form of controllable/adjustment on there, still to decide on what I'll use.

I will have some sort of grill to hold the fuel in between the fuel-door and the air-intake pipe, so that the fuel does not block the air-intake.

Click on the diagram to view a larger, full resolution diagram.


Work in Progress

I've now cut the top of the gas bottle ready for the hot-plate, now I've just gota find one!


me cutting gas bottle with grinder and 1mm cutting disc

Here's me working on grinding out the fuel-door for my wood burning stove. The dimensions I went for were:angle grinding

18cm down vertically.

15cm across horizontally.

I had a 1mm thick cutting blade on the grinder to try and minimalism the amount of loss of metal in hope of using the metal-door that I cut out of the bottle, however I think even now there is too much loss and there will be a gap, I want to make it an air tight fit as possible to later have good control of air-flow. So I will be using a separate piece of sheet metal to make a door out of at a later date.

The work is going well so far, I have roughly cleaned up the edges of the cuts so far so they are not to sharp. Next I will need to decide on a size for my chimney and an appropriate hunk of metal for my hot-plate that will sit on top. Once I have decided on a chimney size I can cut the hole for that, and then providing I have found a hotplate I will prepare the bottle and joints for welding. I've got a disc for my grinder to clean off the paint etc. from the bottle. I don't have any experience in welding, Im pretty sure I wont be doing it myself (you never know!) so I'll probably get everything as ready as I can and then get a friend to do the welding.

cut out fuel door out of gas bottle new door in blue gas bottle stove wood burner

Article not yet finished  come back later


Other Resources

http://www.bushcraftuk.com/forum/showpost.php?p=373641&postcount=6

http://www.stonecarve.com/woodburners.html

 
Comments (53)
53 Friday, 18 December 2015 00:05
Rustaholic777
So you really aren't going to finish this stove build.
52 Monday, 05 January 2015 00:40
Steviii G
Eclectic thoughts:-
Wood burns best when vented from above.
Coal burns best when vented from below..(on a grate).

AT ONES OWN RISK..I accept NO responsibility.
My IDEA is for a wood / oil burning stove. When heated, drip old engine oil onto a piece of (now hot) metal (tow ball?) in the centre of the fire. The rate of flow of oil controlled by a simple twist valve like on a water pipe to the washer which is situated away from the heater. The waste oil is to be from a reservoir, eg a 5Litre can or plastic bottle with whe top cut off.
The feed for the oil is via some brake pipe.
As the oil hits the tow ball or similar, it splatters/vapourises giving rise to a hotter clean burn ..hopefully.
Thoughts anyone?
51 Monday, 29 July 2013 13:47
jason roberts
Just read the water and gas bit hmmmmmmmm just turn it upside down and open the valve the liquid gas will escape till its empty never try to cut the valve off always unscrew them with a large adjustable and a steel bar to brace the bottle with. I work with gas bottles before you ask.
50 Monday, 29 July 2013 13:37
jason roberts
Don't forget to burn it on a fire before you use this as they give of some fumes when the paint melts , also they make better cookers when you turn them on there sides as you can slice the side completely of and weld a flat piece of steel on which gives you a better work surface to work with.
49 Sunday, 14 April 2013 19:59
prepper paul
I'm going to make a stove also, picked up some great ideas. I don't weld so am going to try to fabricate everything and bolt together and use exhaust paste. What do you think??
48 Wednesday, 27 February 2013 19:12
Domster
Fill cylinder with water holding up to the open valve takes time but pushes out the gas. Cut the top hand gard off 4 or 5 1inc welds ten cut off brass valve. Easy done, great for on your decking when sat in your garden on a summers night when it gets a bit chilly
47 Tuesday, 22 January 2013 14:54
James Sax
Hi thats cool. I am just planning to make a stove now, from scrap materials (im starting with some old compressor tanks).
Have you seen the crazy complex flowering elbow design stove (downwards burning with a separate heating unit bit)?? I would like to know what you make of it??
46 Saturday, 13 October 2012 20:40
fission9
What I did for the door, was that I got two tank ( same size ) cut the door. Then cut another door from the second tank a little larger, so the it over lap the hole from the first about one inch all the around. I got some replacement gasket from a wood stove store, and installed on door. That made the door air proof.
45 Tuesday, 18 September 2012 20:42
Philip Tebbs
looks rather good so far :o) I made a similar stove a couple of years ago to heat my shed when I'm hiding from the kids in winter! I also used a thin disk in an angle grinder to make the door (one of the really thin "stainless steel" disks - don't be fooled, they'll cut anything!) and used the piece I cut out to make the door. To be honest, the gap is negligible in use and doesn't affect the air flow to any noticeable degree. One thing I did do though was to cut down one side first, then weld my hinges on (two mild steel butt hinges) and then cut the other three sides. That way I knew my door would be a good fit. For the air inlet I fabricated a hinged flap at the base below the door which works fine. I made a chimney from steel table legs welded together which are 3" diameter. This is really too small and I get problems with smoke until it's really warmed up so I'm looking to move up to at least 4". I like the hot plate idea - I may modify my stove to incorporate one too!

Phil
44 Friday, 13 April 2012 21:33
rake
nice job im in the process of makin a stove with a oven using 2 bottles picked a few ideas off of yours
43 Sunday, 22 January 2012 20:38
Michael Edwards
Ash, happy new year to you. Did you get this finished? I am starting one now. Regards mike
42 Sunday, 04 December 2011 08:14
welly 1
did this ever get finished ?or is it just another pro left in the corner gathering dust.
41 Monday, 14 November 2011 12:05
Will
This looks really good, Great job matey! Have been looking at having a go at making one of these but probably a smaller gas bottle.. are you welding on door hinges?
40 Friday, 04 November 2011 18:44
crusty
hi what way do you turn the valve to remove it
thanks
chris
39 Friday, 09 September 2011 12:23
Ashley Cawley
@Robert - I filled the tank with water by first venting the bottle as much as I could using a screwdriver in the valve, next unscrew the top of the gas bottle then I used a small tube and funnel to fill it.
38 Wednesday, 07 September 2011 18:58
Robert turtle
Can you please tell me how you filled the tank with water in the first place?? i really need to find out how to completely empty the can of gas so i can safely cut it open!

Email:
beccleskingfishers20@hotmail.com

Many thanks.
37 Monday, 04 July 2011 21:37
Richard Higgins
Can you tell me how you fill the bottle with water before you start cutting the top off..?

If you can email me I would be very grateful
r.higginsdg2@yahoo.co.uk
36 Friday, 24 June 2011 09:54
Austen Millard
Hi, having had a go with a baby 4.5kg bottle, I'm now looking to try a 17kg bottle.
The heat output is quite amazing. Its a shme we can't use these for backpacking, it would provide such s nice end to the day! warm bivi, hot tea and toast.
Thanks for the idea.
35 Friday, 10 June 2011 11:08
Janosch
Don't use exhaust paint, it will stink your room out for a year. Use proper stove paint, it isn't expensive. That stinks a bit on firing up but not half as much as exhaust black.
34 Monday, 02 May 2011 11:14
H
i looked at he idea of making a wood buring stove out of a gas bottle and i have sucessfully achived this and would like to share my film for all if you have any questions fire away

Here is the youtube link:
http://www.youtube.com/watch?v=YLNZupbz9d0
33 Thursday, 31 March 2011 19:56
v8seriesone(Dom)
I've made one of these, and am now half way through modifying it again - I'll have to sort some pics or something for you. Enjoyed your knife reviews by the way.
32 Sunday, 21 November 2010 16:48
David
You should check out "hotpod" stoves i think they are based in the south west and do this as a business, their stoves are inverted bottles and vw beetle parts. Now they make the parts up rather than 100% recycled which is a shame but understandable
31 Thursday, 11 November 2010 17:40
Kieran Broadfield
Looks absolutly awesome!
30 Thursday, 04 November 2010 07:24
Ashley Cawley
It hasn't yet been finished Julia, I do what I can but I've started many dozens of other projects since, you know what it's like! :(

I one day hope to finish it, I need to get round to learning some welding skills from my cousin. Keep checking back as there will be something new hitting NaturalBushcraft very soon!
29 Thursday, 04 November 2010 04:01
julia marshall
Hello, it's almost 2years to the day since this article was posted, was wondering if it ever got finished and if so where I can find the rest of the instructions.
28 Thursday, 23 September 2010 17:19
Joe Northumberland swordfish
Hi Fella really great idea,

What i would have done was cut the door for fuel lower with the door wider and fatter, and then on the top of the bootle put a hinge with a lock and have a grill in the middle of the bottle aswell as the hot plate on the top, but awesum idea fella

Joe
27 Friday, 23 July 2010 07:53
Howitt
Hi all ive had a go at making one of these and its great ive had it fired up a cupple of times now and it works perfect, i would like some advice on painting it please ive burnt most of the paint off and its gone like a grey colour( it was a blue bottle to start with ) to paint it would i need to sand it down to bare metal then paint or would it be ok to spray strait onto the grey?
26 Monday, 19 April 2010 22:29
Cossack Vince
I used inert beer-gas (co2) to expel the propane remnants before cutting with disc.
25 Monday, 19 April 2010 00:28
Sir awesome
Thankyou
24 Tuesday, 23 March 2010 14:59
Dave Socrates
This is a great idea. Be careful if the valve is still in the bottle even when empty of gas though. I used to work in a gas bottle factory and we reconditioned them and refilled them. We had a special tool to take out the valves (which are often glued in as well torque set). Every now and again Health and Safety would give a demo showing how a bottle that had been emptied of gas could still retain enough pressure to send a valve 100 feet into the air! If someone was standing over it doing it by hand, they wouldn't have stood a chance. So do try and get one that has been already devalved.

Having said that, these stoves are a great idea and I would certainly like to have a go at making one. A great article. Good luck!
23 Tuesday, 23 March 2010 10:33
mikymoke
Hi good morning i wish to biuld a woodburning stove compleat withig oven to fit into my narrowboat so is the any body out there who can help with any designs thanks Mike
22 Friday, 19 March 2010 22:41
TattooMart
Started Nov 2008, is this not finished yet? Love to see it if it is..........
21 Sunday, 07 March 2010 17:27
Bottle stove mk1
If you have a vice you can chins a piece of wood through the support stand holes at bottom of stove.simply get the wood well through the holes and use the leverage to twist the thing. Probably you will need the valve clamped upside down in the vice. De gas with water, then cut away to your hearts content! Be aware the tank will stink until it is lit up.
20 Monday, 15 February 2010 20:56
Ashley Cawley
>> Johnny
It's only stupid if you don't know how to safely discharge the gas from these bottles. If you fill them with water and empty them they are safe to work with, you would be paranoid to think otherwise.

Why would someone do something like this? Maybe because it's a project? something new to learn? Skills to practice and try, fun to be had in the trying & testing and final use? Knowing that you've recycled numerous parts of junk and turned them into a functional/useful piece of kit that would have otherwise gone to landfill. It's a mentality like yours ("Cheap Chinese stoves .... justa few quid") that puts more broken crap into landfills.
19 Monday, 15 February 2010 19:20
How Stupid. Why would you want to bother? Cheap Chinese stoves are available for justa few quid and involve far less effort. Cutting up gas bottes (even empty ones) using an angle grinder represents the height of stuipidiy and is highly irresponsible. Leave these containers well alone. If you do want to do your bit from the environment buy dragging out rubbish from your local canal I would suggest rescuing an old shopping trolley... and turning it into a BBQ instead.
18 Wednesday, 20 January 2010 19:33
hello. ive used a 15 kg bottle and ive got a 4inch flu at the top the door ive cut is pretty much top to bottom just before it curves round ive used the same bit of metal as the door with hinges but ive got a blades width gap all the way round it ive got a grill for the wood to sit on and ive cut a slot below the grill for air intake it works well but when i open the door smoke comes out in to my shed and when i close the door the fire burns a bit to quickly any susgesstions thank you
17 Friday, 15 January 2010 19:06
You gotta love a gas bottle stove! In response to Amanda's post about a burner for her van, I was in Scotland a couple of years ago and met some people with a long wheelbase LDV and for their burner they had a trimmed down lamp-post, perfect. All they had to do was cut it to the required lengths top and bottom, put hinges on the door and weld a plate into the bottom. Truly one of the most inspired burners I have ever seen- so simple.
16 Sunday, 10 January 2010 19:37
After purging the bottle of gas by opening the valve and standing the bottle upside down outside for 48hrs, jig saw the top half of the handle off the cylinder. Next , clamp the valve with a set of stetsans and bash the handle of the stetsans anti clockwise with a lump hammer {an ordinary claw hammer just doesn't pack enough punch} Keep hitting and eventually you will see the valve begin to turn slightly, at this stage the valve will become easier and easier to remove with each blow of the hammer.
Good luck. hope it works for you and lets all stop giving our hard earned money to these greedy energy suppLIARS who want us all to be at their mercy.
15 Monday, 28 December 2009 09:44
good idea with gas bottle i happen to have a few tall water pressure tank used for the
the old sistern so i built a decent wood stove it has 4" flue pipe and bottom inlet be low brick layer is a rotor off a car for air and to holes below loading door that 5/8 diameter bolts slide into for air adjustment any question on problems call 740 343 0119
14 Thursday, 03 December 2009 12:36
Hi, thanks everybody sharing their ideas...
im hoping to make a burner myself for my van. It seems natural to me that if you wantt a hot plate you just turn the bottle upside down,
Or is that a bad idea? why in that case?
13 Tuesday, 01 December 2009 23:05
I've made a good few stoves and BBQ's out of gas bottles now and have occasionally come across a valve that won't budge. Once you have vented as much gas as possible by conventional methods i.e. through the valve reducing the contents to atmospheric pressure, it is possible to drill the cyclinder. You need to use a drill on a slow speed and use a coolant (oil or water) to keep the temperature of the drill bit and the cylinder low and also to prevent sparking. Make sure the drill hole is at the absolute highest point when filling with water so no gas pockets remain after flushing. Removing the valve is always the best option but with this technique you can still use cyclinders when you can't shift the valve or you can make novelty stoves/BBQ's that retain the main identifying features of a gas bottle. Never be tempted to rush the first parts of the job, particularly flushing with water - diving in prematurely with an angle grinder will end in tears!
12 Monday, 30 November 2009 20:20
I am extremely impressed with the resourcefulness and experience of many of the contributors to this article. I would love to give this a try myself but lack the skills and materials required. Would anyone who has successfully made one of these gas bottle burners consider making one for me to purchase?

Thank you.

Daniel.
11 Thursday, 15 October 2009 13:41
Brilliant idea this gas bottle stove for cabins/greenhouse etc but what about details of hinges and fire door latches? Looking forward to more of this, regards to all, Ian.
10 Monday, 21 September 2009 20:09
Hi Guys

I want to heat my hot tub with something similar and whilst surfing for info I cam accross this. I was think of coiling thin copper pipe inside the upper part of the chamber and pumping water through it> I have seen someone on you tube do it without a pump. Whilst I'm at it, I may as well go the whole hog and join another bottle on the side and have an oven (I say that on youtube too). Anyone got advice on any pitfalls etc.... Great info already on making efficient burner. Daz
9 Monday, 21 September 2009 19:24
Unscrew the brass stopper with the right size spanner (my stopper was square and not hexagonal) unscrew anti-clockwise, it will be tight but give it a good bang with a hammer to get it going, it should then come off no problem
8 Friday, 04 September 2009 14:37
Ashley Cawley
Thanks for that great advice Corwen, I will certainly take heade of it when I finish the project off.
7 Wednesday, 02 September 2009 18:28
Hi Ashley, I've lived with gas bottle stoves in trucks and boats for years so perhaps I can offer a little helpful advice.

Arnie is right, air from below will make the fire gutter and then go out with wood, though it works with coal. Better than an air pipe is a close-able hole in the door, just cut a semicircle out of the door, and bolt a bigger semicircle of metal over it to make an adjustable air vent. Fold one edge of the semicirlcle outwards so you have something to tap round with your poker. Sand in the bottom will work well to insulate the bottom.

If you want to cook on your stove then a flat top is better with the flue coming out of the top at the back. If the cooking surface is above the level of the flue it won't get very hot. Best bet is a baffle which directs the air up the front of the stove and along the underside of a flat hotplate to a flue (steel stink pipe?) welded on at the back. If you cut the top off the bottle, then cut it in half and drop it down into the stove you get a ready made baffle. Weld a flat plate on top. Plus its easier to get a good fit for your flue into a flat surface.

Also the proportions of your door look too high, smoke will likely come out of the top when you open the door. A low wide door will allow you to run the stove with the door open without smoke coming out.

Anyhow god luck!

Jug, don't use anything made of aluminium whatever you do- it can melt at the sort of temperatures you can get burning wood. A steel beer keg should work OK though, and I've seen burners big enough to heat a large marquee made from oil drums.
6 Tuesday, 25 August 2009 10:01
Hi, great idea,I was thinking of buying a cast iron wood burner for my allotment cabin for the coming winter and these are around £150 plus for an half decent one.then on seeing this,thought great idea,got an old gas bottle in fact a couple at bottom of garden,as scrap man wont take.( a see why now,due to the risk of explosion these have to be vented correctly).so dont fancie risking that ..any way got me thinking can you use beer kegs and what matrial does it have to be,ie steel can you use aliminume kegs ect. Any feedback will be much appreciated.thanks ste
5 Friday, 22 May 2009 22:30
Hi Ashley.
As someone with experience of woodburners, allow me to offer a few thoughts.

1. It is far better to feed air from above the combustion chamber than from below in a wood burner. This encourages a bed of hot ash and
improves output and efficency. (This is very differnt to coal which is fed
air from underneath) It may well be that the gap around the door is
sufficent, failing this an adjustable vent fitted in the upper section of the door would do.

2. To increase the combustion temperature, and again improve output and efficency insulate the base of the combustion chamber.
A 25mm piece of lightweight building block cut to shape is cheap and easy. Use an old handsaw for slicing

3. To increase the output to the hotplate, a thinner steel section,
say 4mm of flat plate rather than the old disc brake. Even better cut the cylinder lower down and have a larger plate welded.
4 Sunday, 10 May 2009 09:20
Ashley Cawley
Thanks for the comment. I did say about filling the bottle with water to displace the gas in the article, perhaps I should make it bold to be clearer as it is an important step.
3 Saturday, 09 May 2009 15:46
Cool idea, (or hot!), however, when the bottle is 'empty,' it still contains gas at atmospheric pressure. There is still a very real explosion risk. Venting the bottle is worse still as it results in a gas / air mix. Being contained this could well result in an explosion. Instead, unscrew the brass valve, (normal anti-clockwise, it will be very tight). Now fill the bottle with water to push out the gas, do this outside of course! Then empty and the bottle will now be filled with just air.
2 Sunday, 03 May 2009 19:56
Ashley Cawley
Thanks for your good question Jug. As you can see from some of the photos above I completely removed the valuve & the chunk with it by angle-grinding out the top of the bottle and taking it off, but yes first you do need to depressurize it and drain the bottle of any remainding gas. Never assume a gas-bottle is empty until you've done this.. when you've used/burnt up the gas using conventional methods, then carfully wedge a screwdriver to the valve to manually release gas, leave that going outside in a safe place for 48hrs. When I couldn't get anymore gas out by manually opening the valve I next slowly started to hacksaw the brass part of the valve, brass wont spark to therefore isnt a fire/explosion hazard, so I went slowly with the hacksaw until I took it off and there was an obvious hole in the top of the bottle, still dont assume the bottle is empty! I next inserted a plastic tube into the bottle and filled it full of water to the top, garanteeing that all gas was displaced & pushed out the bottle. At that stage I then felt confident to angle-grind the top of the bottle off.
1 Friday, 17 April 2009 00:18
Hello Gr8 Artical mate. ive been wanting to do this since i was a kid but never got around to it. I now have all the gear to go ahead and try making my own burner altho i am stuck at the very first stage which is how do i get the damn valve out of the bottle? I've tried using a spanner and undoing it but to no luck infact the valve is starting to twist, I also do not want to use a disc cutter on the bottle due to explosions from the spark.

So please could you help me and give me advice on how to remove the valve, The bottle i use is a 15KG (similar to the picture you have above.

Thanks
juggalo

Add your comment

Your name:
Comment:

Natural Bushcraft is a personal project aiming to provide a free bushcraft resource available to everyone.

Sharing Bushcraft Skills and Knowledge Freely regardless of age or status is important to me.

Welcome to the...
'The True Spirit of Bushcraft'

Best wishes
Ashley Cawley.

UK Wild Food - Jan

Listed here are Wild Foods that should be available in parts of the UK in January.

Dandelion
Nettle
Daisy leaf

Gorse flower
Greater Plantain
Ribwort Plantain
Buck's Horn Plantain (coastal)
Scurvy Grass
Hogweed
Chickweed
Sea beet
Sea Radish
Pennywort (particularly good at the moment)
hawkbit
Watercress
Alexanders (very good at the moment)
Chirvil (be very careful , as Hemlock Water-Dropwort is starting to sprout now and looks very similar, but is deadly poisonous!)
Cleavers
Sea Purslane
Rock Samphire (still usable, but a bit over now, coastal)
Yarrow
Rose Hips
Common Sorrel
Ivy-Leaved Toadflax
Wood sorrel
Three-cornered leek
seaweeds

*These are just some of the wild edibles you will find in the UK this month.

The Hedge Combers

the-hedge-combers-165

A beautiful blog by my friend Janie sharing tips on self-sufficiency, homemade recipes, growing fruit, veg & rearing animals for meat & eggs.

Woodland Valley

 
woodland-valley
Woodland Valley an Organic Farm in the centre of Cornwall.
A Bushcraft Friendly Campsite with Ancient Woodland and Group Accommodation  available.

Ravenlore-150px-wide
Another Bushcraft & Wilderness Skills website that I love, by a friend & superb Photographer Gary Waidson.

Bushcraft Search

Who's On the Website

We have 120 guests online

Follow Me on Twitter

Twitter Icon Follow Ashley Cawley
@NaturlBushcraft

Subscribe on YouTube

Subscribe on YouTubeEnjoy our videos? Be sure to Subscribe to our YouTube Channel to hear about our latest releases.

Help This WebSite

ashley-cawley-100px

It takes a lot of work to build & maintain this site, I don't get paid for any of this and I choose not to display adverts, I offer it all for free. However it does cost to run the site, if you'd like to help me with those costs you can do so here:
  

May 2019

Joshua Brown

Febuary 2019

Ross Everitt

May 2018

Carl Fitches

Nov 2017

Tony Rush

Oct 2017

Luke Moncrieff-jury

July 2017

Ross Everitt

April 2017

Matthew McGlone

Thank You
Supporters of
Natural Bushcraft


Claire Cawley's Blog

Claires Blog Gardening Growing Chickens Cooking Household

My wife Claire has started her own Blog about Gardening, Growing Your Own / Self-Sufficiency, Chickens, Green Cleaning and much more! Please take a look, comment & bookmark the site if you enjoy it.

www.ClaireCawley.co.uk