Results 1 to 10 of 10

Thread: Retired SAK Fieldmaster, First Kuksa

  1. #1

    Retired SAK Fieldmaster, First Kuksa

    Retired SAK Fieldmaster, First Kuksa

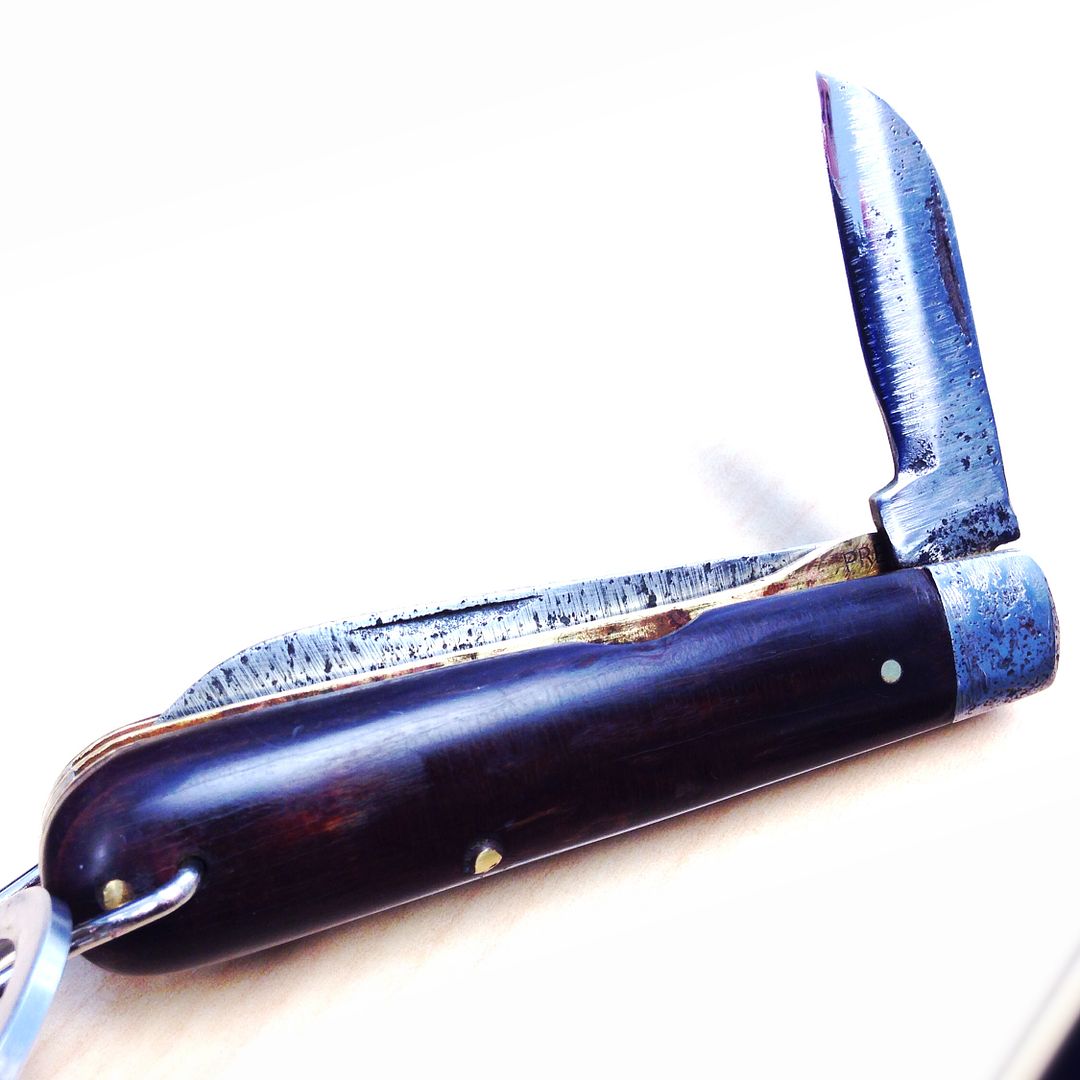
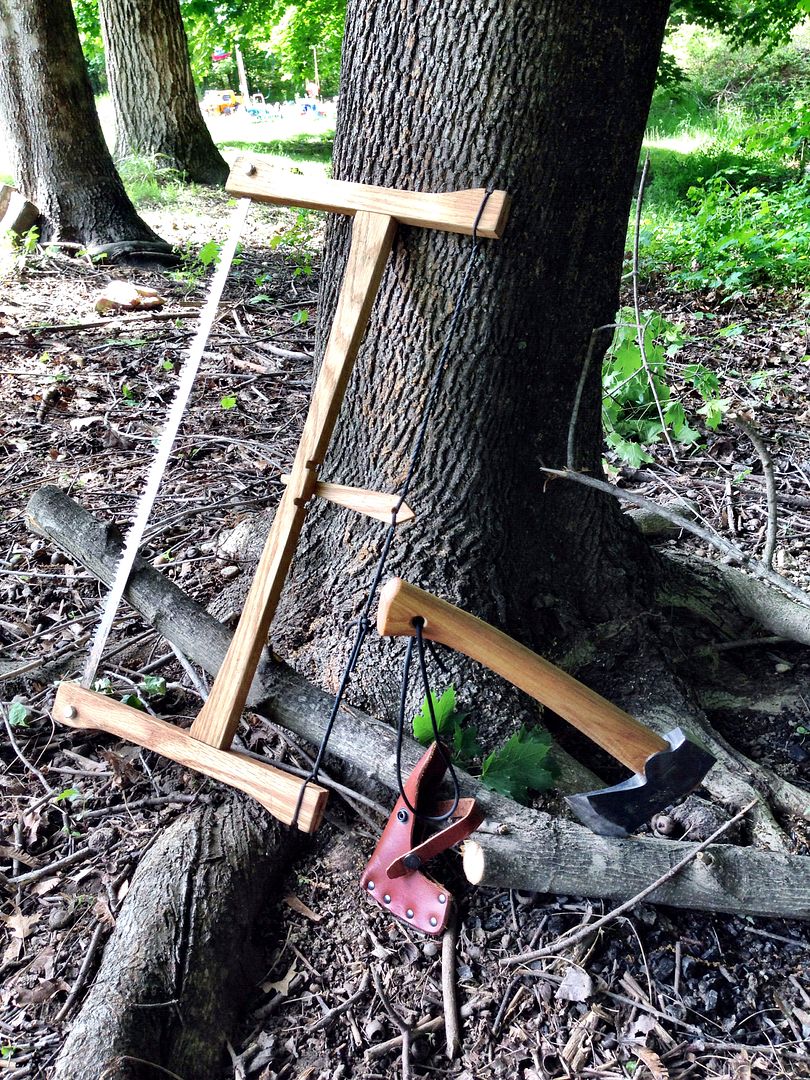
    I've had a number of fun outdoor / bushcraft related projects going on lately, from the restoration of old American Made (Collins and Coucil Tool), to the building of my own oak foldable buck saw (with paracord tension string), the creation of several knife sharpening paddles for my 220, 400, 600, 1200 and 2000 grid wet/dry sandpapers and leather strops, and the restoration of an old knife of my Grandfather's that I received when I was a boy. Each one of those topics should be several detailed posts of their own (and some are), but I'm short for writing time and wanted to post some things before I'm overwhelmed! I've grown frustrated with the lack of edge holding ability of my swiss army "fieldmaster" under repeated use on these recent projects, so I decided to dig through my keepsake knives looking for a new carbon steel user. I enjoy sharpening just as much as the next guy but don't like seeing a hair-popping sharp blade lose that edge after a few minutes whittling! I settled on a knife that I thought was a Barlow based on the handle shape, but soon learned was an old electrician's knife (probably Camillus) which my grandfather had modified (grinding the screwdriver into a utility blade).

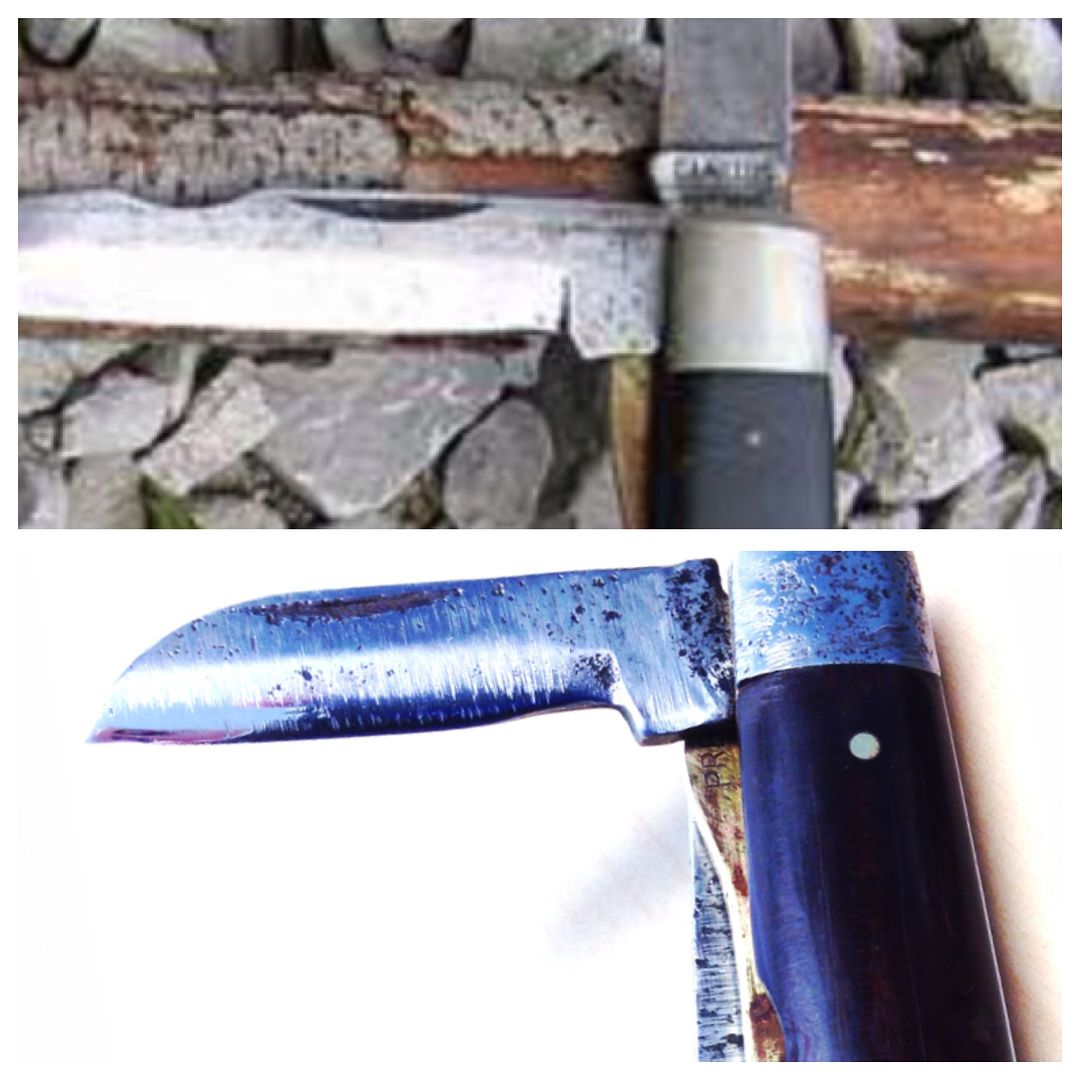
    I cleaned it up, sanded and sharpened the blades, oiled it up and removed some rust, linseed oil for the rosewood handle.

    Within days of carrying it, I was able to give it a true test.

    This week I've had the opportunity to put the buck saw and Gransfors Bruks Wildlife hatchet (that I had recently acquired) to hard use pruning several overgown maple trees on my property. The canopies on these trees had expanded so far that my lawn was turning to dirt underneath. In an effort to get some sun back on the ground I cut a large number of low branches with diameter's up to around 6". I used the Gransfors to limb and buck baw to section the bigger pieces. Both cut through the hardwood like butter.

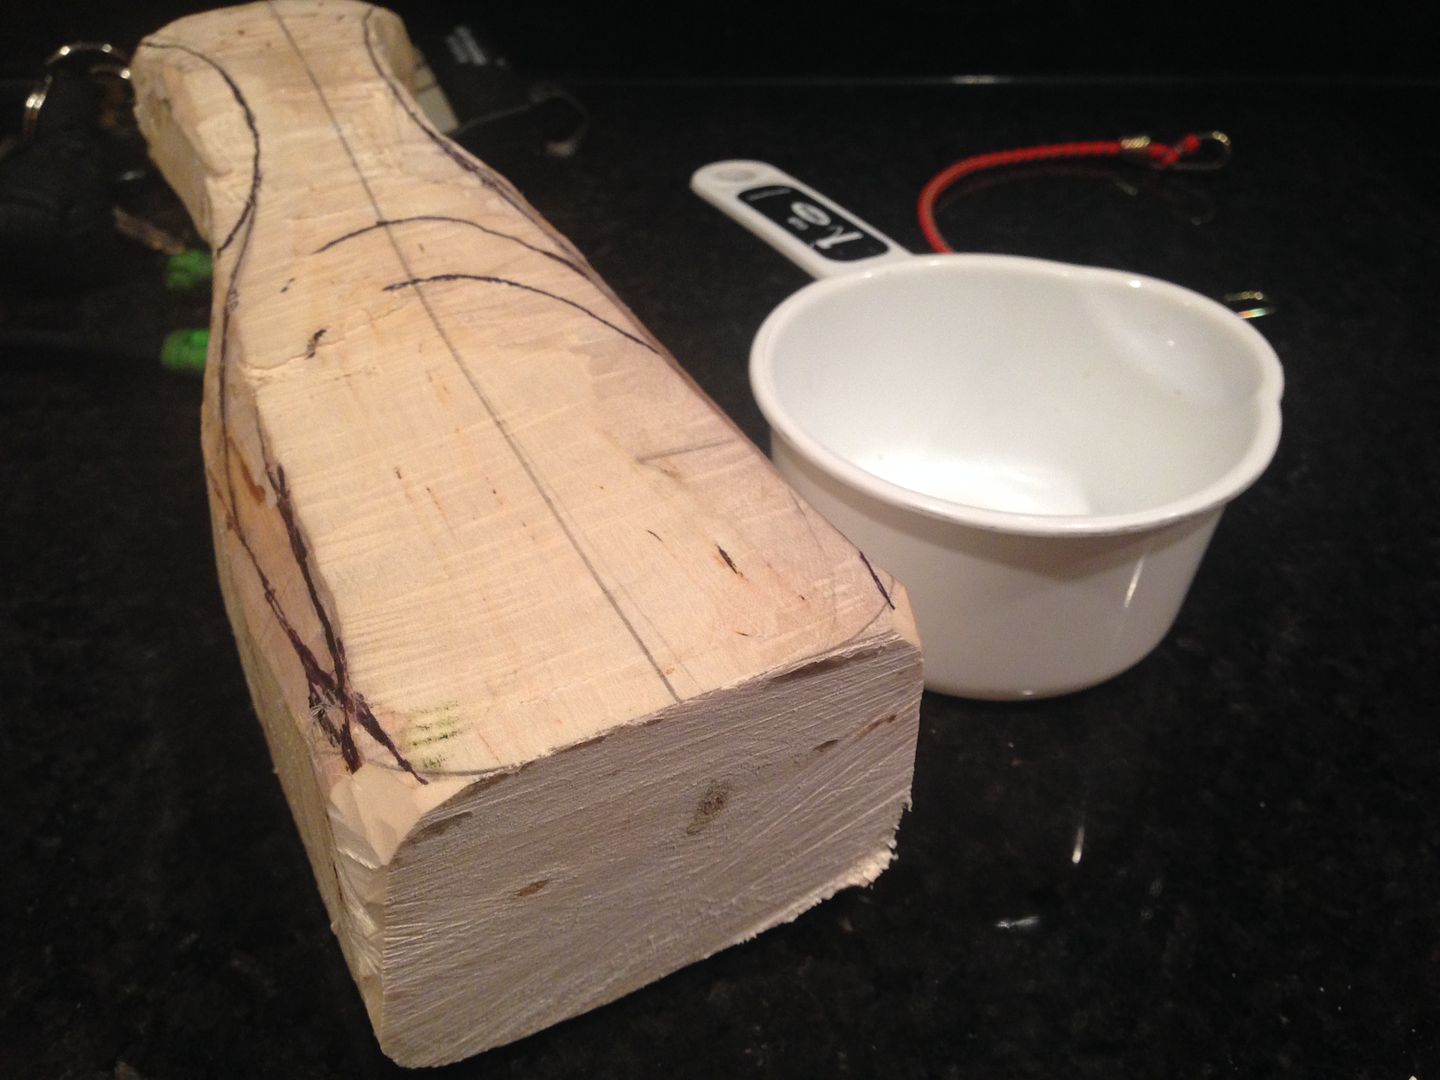
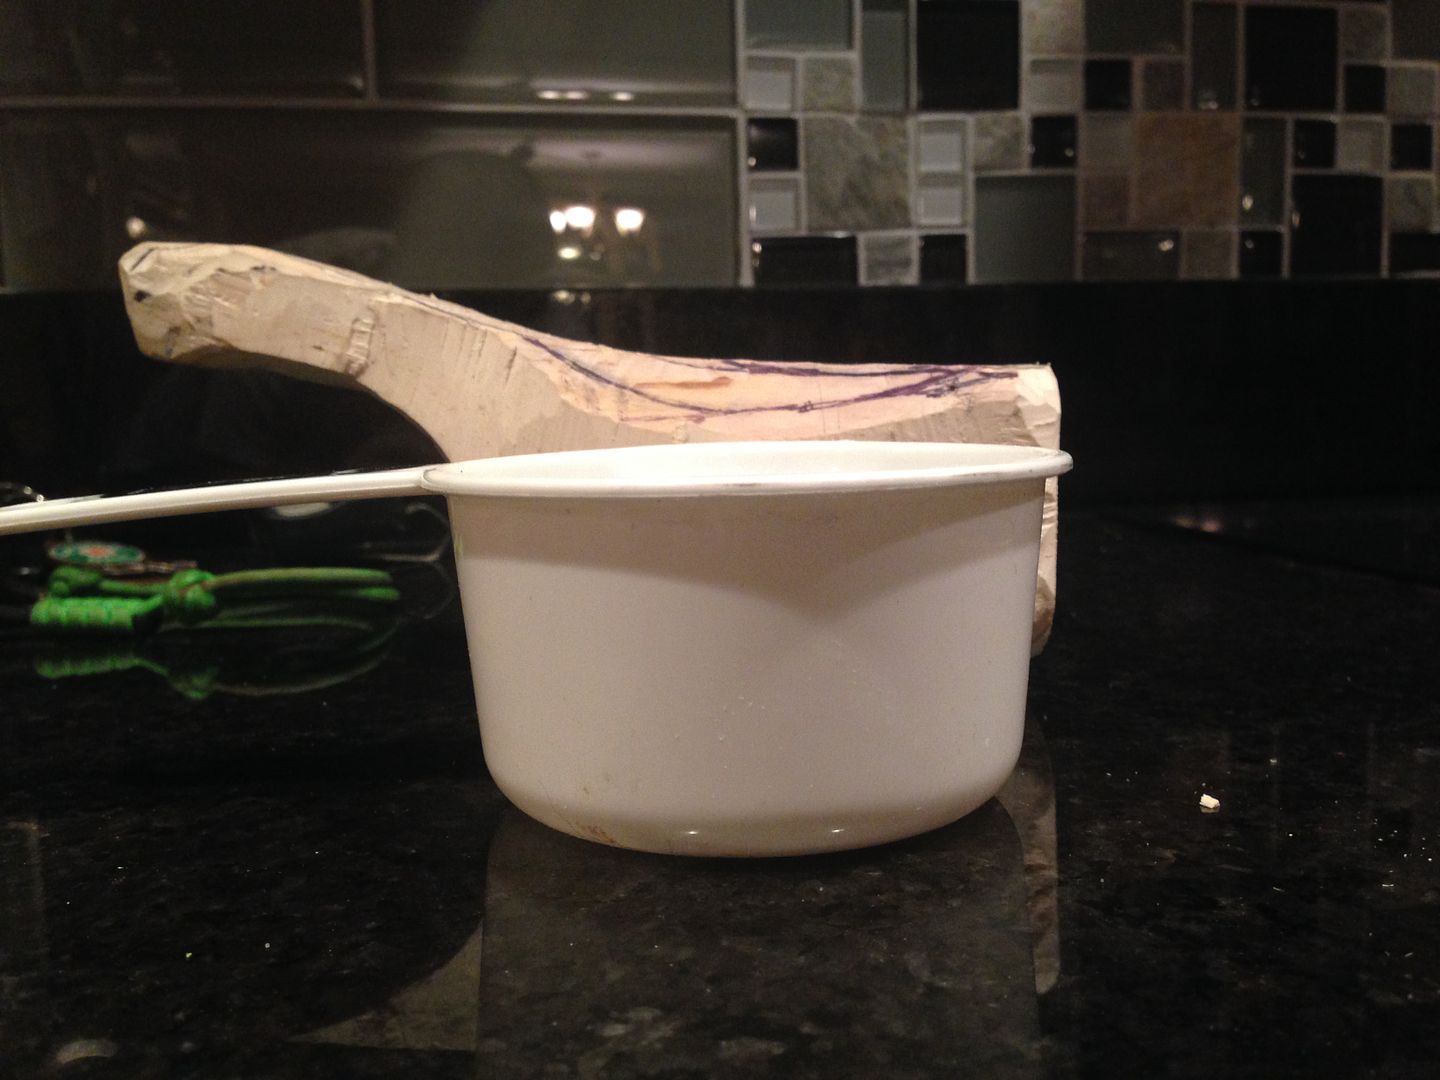
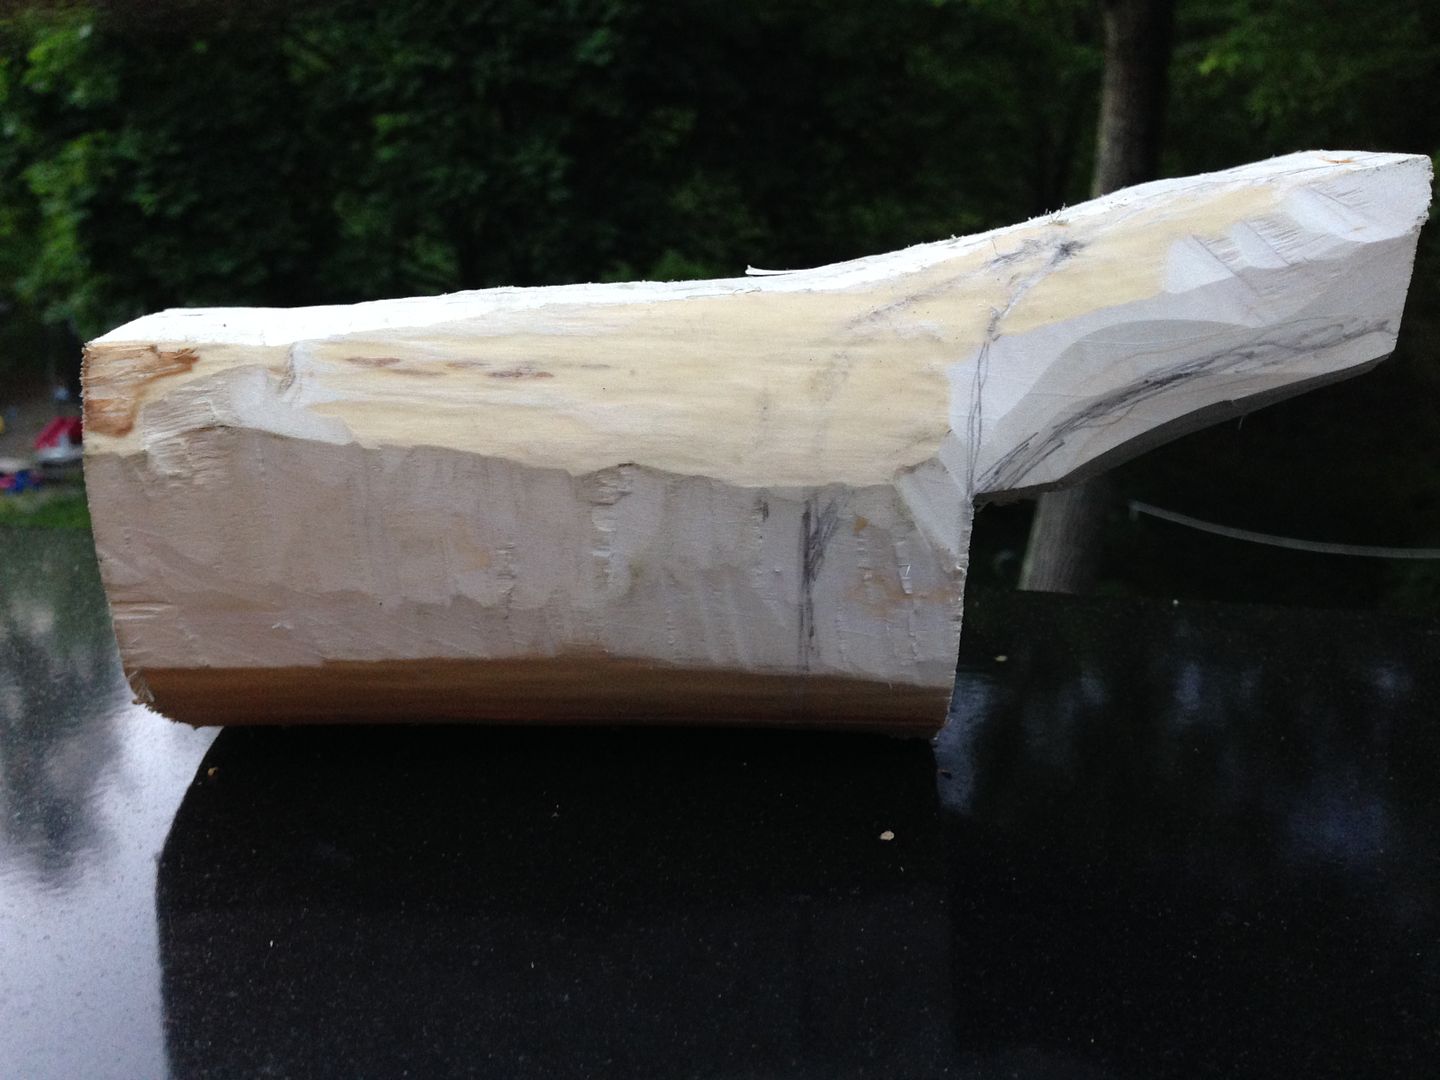
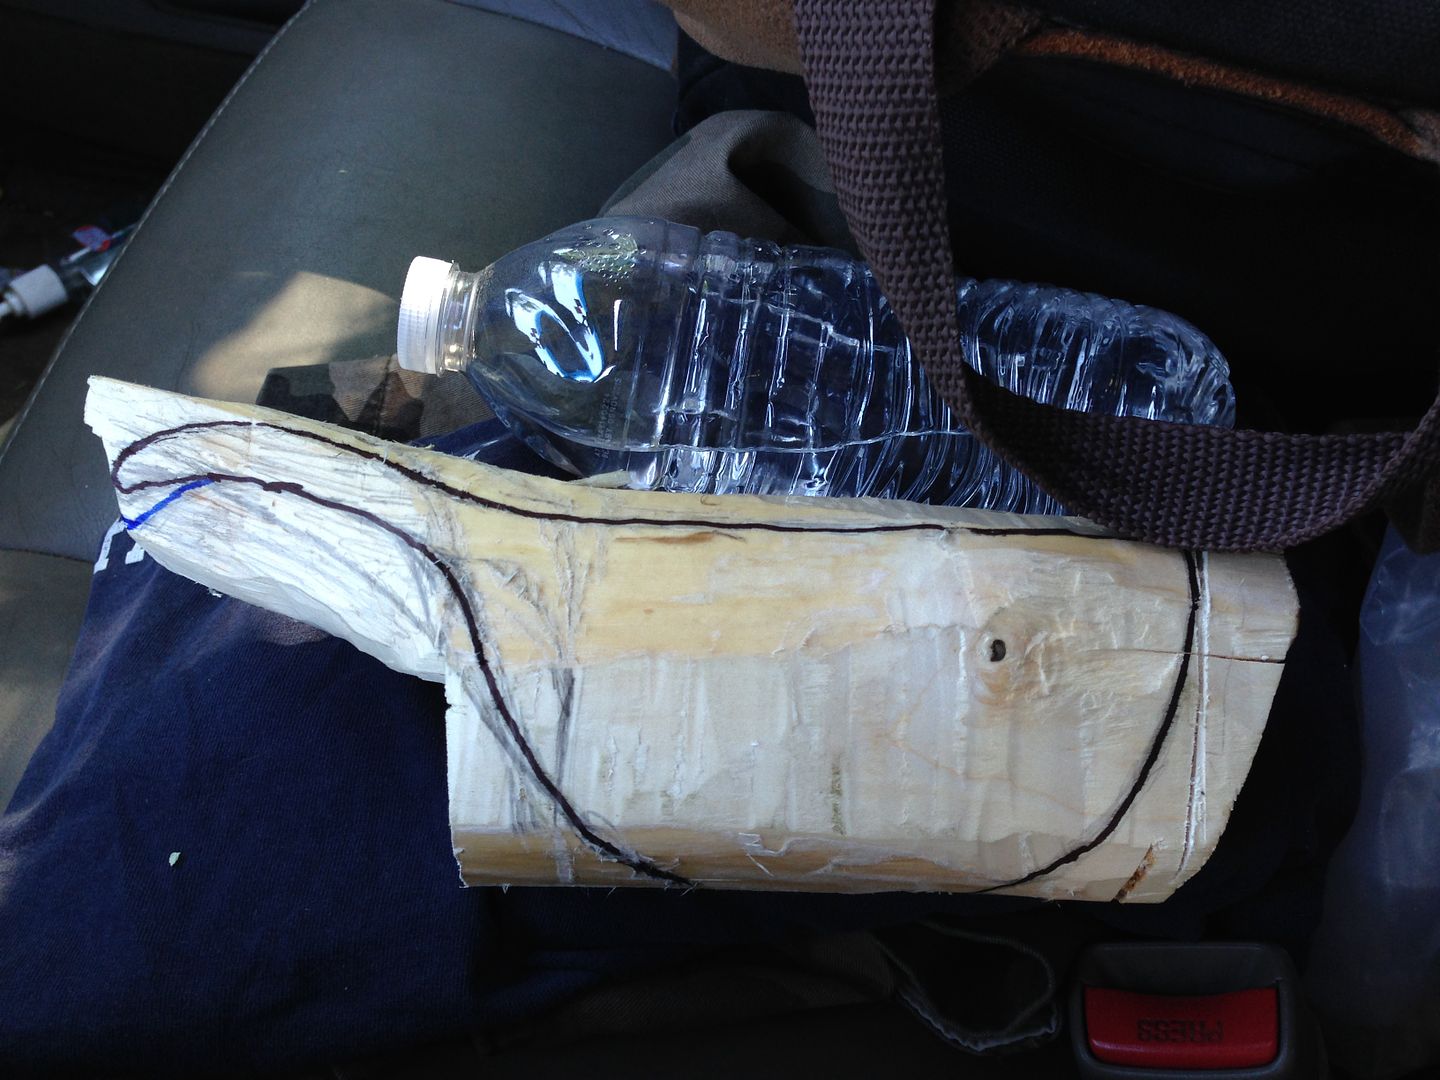
    Recognizing the bounty of fresh green maple I know had on hand, I decided to grab a few select pieces to pursue another project on my list - making my first kuksa (wooden cup). I've wanted to do this for some time, and figured it would be a great campfire project to whittle away at in the coming weeks. I stripped the bark off the branch I selected. Orienting the wood for what I thought was the best use of its natural shape (particularly for the future handle), I sketched some centerlines and cup shape using a sharpie. For some sort of size reference, I grabbed a measuring cup from the kitchen. My buddy pursuaded me to maximize the size so that maybe this cup could double as my beer "chalice" (hense the elongated oval shap right now)! The following photos show the initial rough out using the Gransfors, followed by a "re-draw" and refine shape (profile/side view), and finally the current status after some whittling and top/plan view sketching for the next refinement.


    I've done a substantial amount of the latest rough work with the "new" pocket knife's main blade. The blade is hair popping sharp but still requires firm effort to work the maple. This is dense, tough wood, even though its green! What pleases me beyond words is that after each session so far (probably two hours total use) the blade has passed the shave test. I lapped the strop a couple times with it and it seems literally like I just sharpened it fresh. Goodbye SAK, goodbye stainless, I'm a carbon devotee for life! Maybe an opinel will be my next purchase.

  2. #2
    Ranger OakAshandThorn's Avatar
    Join Date
    Sep 2012
    Location
    Connecticut ~ New England
    Posts
    2,465
    Great restoration .
    That should be a nice woodcrafting project - let us know how it turns out
    My blog, New England Bushcraft

    "Give me six hours to chop down a tree, and I will spend the first four sharpening the axe."
    ~ Abraham Lincoln

    "Be prepared, not scared."
    ~ Cody Lundin

  3. #3
    Quote Originally Posted by OakAshandThorn View Post
    Great restoration .
    That should be a nice woodcrafting project - let us know how it turns out
    Thanks ! I see a crack and I have no idea how it formed (shock of hatchet work?). I'm a little concerned about it, not having worked much with wood. I'm afraid to go too far and have it crack on me. I've cut it back hoping to get to crack-less wood. We'll see how this played out.


  4. #4
    if its still green wood, when not working it keep it in a bag with loads of other shavings from the same piece, this will help it dry out slower and help prevent splitting or checking, do not be to detoured by splits as these can be repaired, even if your piece splits clean in half, do not get annoyed with your work or yourself, use it as a learning curve, ask your self why it broke, look at the grain see what way it runs and try to use it to your advantage, this may sound silly but after you have split a log in half lay one half with its split side to the ground, make your kuksa from the wood this way up, try it hopefully you see what what i'm getting at with grain etc.

    cheers

    Madz
    I'm a simple man, pleased by simple things...................Nature wins.

    Take your time and do not rush, take in every thing while out in the brush.

  5. #5
    MadZ thanks for the advice! Click image for larger version. 

Name:	ImageUploadedByTapatalk1401970146.372180.jpg 
Views:	159 
Size:	18.1 KB 
ID:	12184see this sketch; is this what you mean? Wouldn't it require a really large diameter to make a decent Kuksa?

  6. #6

  7. #7
    yes dude thats exactly what i was describing, reason for doing it the way mentioned is it utilizes the structure of the wood better, it should help prevent splits and warping, another thing that i forgot to mention, is when working the piece try to work it to an even thickness all over before stopping, reason being it helps the wood to dry at a more even steady pace rather than the thicker drying slower than the thinner piece side.

    also if my memory serves me right the heart wood dries alot slower than sap wood this is the main reason you get mad splits in wood while drying or seasoning, because the outer layers of sap wood are trying to dry at a faster rate than the heart wood, (15% faster) causing shrinkage, another reason the above method should in theory be more stable as you would remove most of the heart wood leaving the outer layers of sap wood as the walls of the cup.

    as for the split in pic its hard to say what it will do, my opinion is it will break off, you have options here, so dont be discouraged,1. glue the rogue bit back on, clamp it, leave to dry and keep carving, if it breaks off, 2. flood the crack with glue before carving, to add stability, 3. carve it as is and hope for the best, if it does not break off, during the finishing process you flood the crack with bees wax keep melting it in slowly building up layers, 4. same as three but varnish seal it with the varnish they use on kids wooden toys, none toxic water proof, takes abuse could be an option also.

    wood carving takes time, and patience, technique can be taught or learned by a person, the understanding of what wood wants to do is one of them things you can only be taught so much off the rest comes from experience and that comes from practice, starting lots of projects and leaving them unfinished or breaking them, all of which are learning curves.

    a good person to check out is mary may on youtube she is quiet explanatory on carving basics that helped me learn a few things of understanding the way wood works
    I'm a simple man, pleased by simple things...................Nature wins.

    Take your time and do not rush, take in every thing while out in the brush.

  8. #8
    Thanks again MadZ. Could cup be turned the other way to better utilize the curve of the wood?Click image for larger version. 

Name:	ImageUploadedByTapatalk1401990292.758718.jpg 
Views:	158 
Size:	16.0 KB 
ID:	12189 like the red dots in this pic?

  9. #9
    yeah you could turn the bowl, but then you have the shrinkage factor to think about, if you carve the bowl like in pic with red dots the left and right side are going to want to pull in a downwards and outwards from the middle if you carve the main bowl to the required finished thickness all the way around in one go you will get some warping but if you dry it slow enough it should not split or crack.

    basically they way the red dots are set out would leave you with two sides of the bowl having heart wood on either side, this does dry out slower than sap wood to some extent when carved because most heart wood is denser than the sap wood outer coat, due to the way the log splits in half normally round, circular shape then split leaving a semi circle shape the heart wood dries slower and the sap wood faster causing the split log to want to convex on its flat side, normally causing a split to appear, down the length of the log, normally starting at an end and running down the center to the other end, meaning your two sides of the cups bowl with heart wood on may split from the lip of the cup down into the middle of the bowl, and the sides adjacent may distort/ warp.

    hope this helps finding it hard to explain, will try get some pics of logs splitting to show you what i mean and in which way the splits may appear
    I'm a simple man, pleased by simple things...................Nature wins.

    Take your time and do not rush, take in every thing while out in the brush.

  10. #10
    Thanks for detail but I am having some difficulty seeing the difference between the two orientations. I'm going to get a birch piece for my second attempt. Will I face the same level of tendency to crack? I may also work this a bit more with an eye towards implementing some of your "options" for dealing with cracks.

Posting Permissions

  • You may not post new threads
  • You may not post replies
  • You may not post attachments
  • You may not edit your posts
  •