


I thought this was such a good modification that it deserved a thread of it's own.
Tigger004 posted photos of the lids he made for his Crusader and Dutch Mug on the "What have you made now" thread. This impressed a few of us and he was kind enough to share his process and supplier with us:
Originally Posted by Tigger004
 I bought mine from the same place and it only cost me £2.25 for a 200 x 300mm sheet in the same thickness (1.2mm).
I thought it would be useful to see the process in pictures. I like photos. So here's how I did. I must say that Tigger seems to have a way with the Aluminium that I don't. Mine didn't turn out quite as nice as his, but I'm still chuffed to bits.
I found a piece of old kitchen cabinet from the neighbour who had her solid Cherry wood doors replaced with plastic coated MDF. She's happy, I'm delighted. Following his instructions, I traced around the lip of the mug.
I decided to use my scroll saw, but in hindsight I would've done better on the bandsaw. I don't like how scroll saws require me to press the wood down.
I cut well outside the line because I was having trouble directing the cut.
A little bit on the belt sander with 40-grit soon had it down to the line.
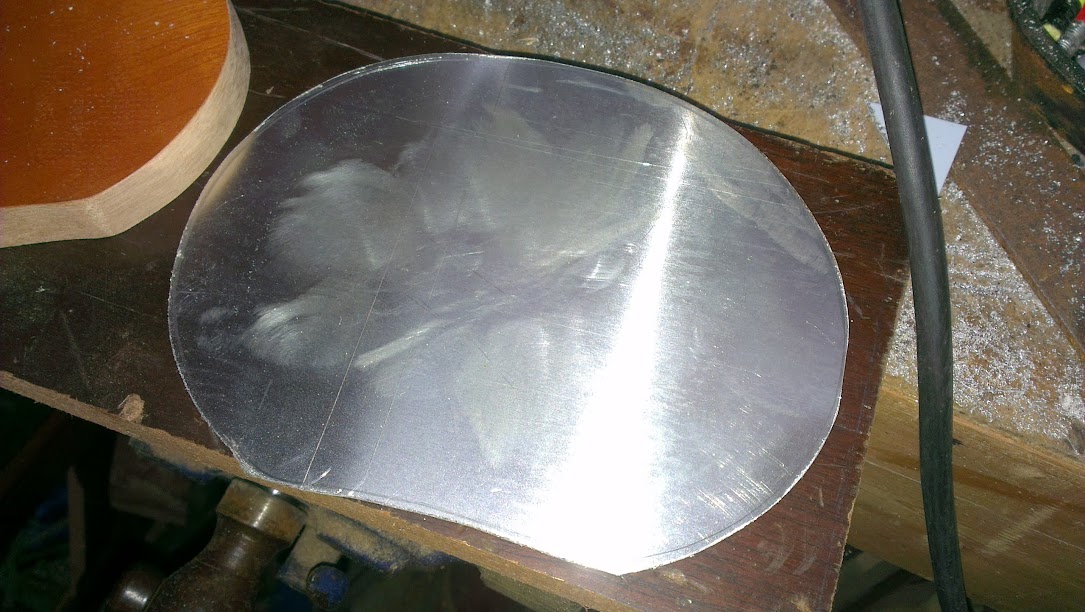
Now it came time to trace around the wood onto the Aluminium. I'm not sure which is technically the nice side; I presume under the protective film lies a clean finish. I traced around the former onto the exposed side. I decided to use a washer for this so I found one that had a "wall" thickness of nearly 8mm which would give me enough lip. In hindsight I think Tigger was right to reduce the size of the lip because there's less metal to crinkle as it's wrapped over the edge.
This shows how the washer is used to trace the outline. I was holding the template in place but had to use my hand to take the photo.
Next came the cutting. I clamped the sheet between the former and a plank of wood in the vice. I tried a coping saw with a very fine blade and was impressed that a blade usually used for wood could cut the Aluminium. But after a little while it was too much and I heard a "plink" as the blade snapped. But I'd cut most of the shape out. I finished the cuts with a hack saw.
A few minutes on the belt sander (I love my belt sander) had the Aluminium almost down to the line:
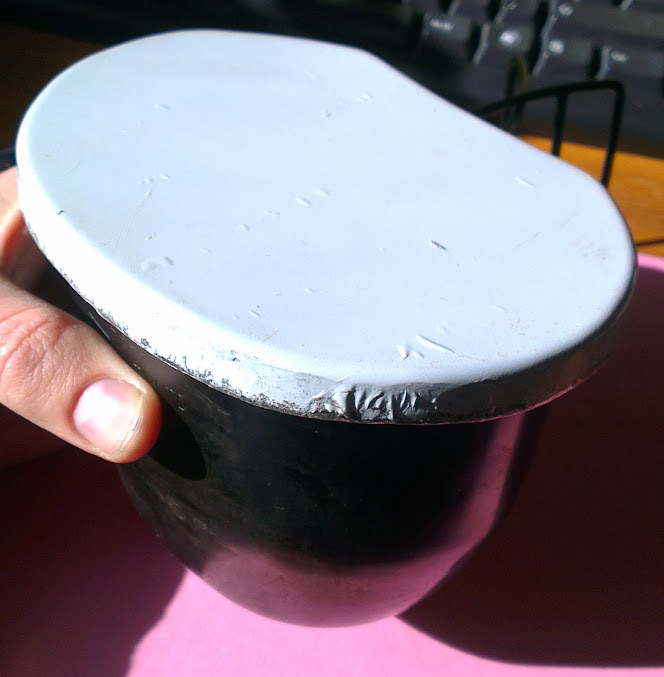
Clamped in the wooden jaws of the vice with the former stuck in place with double-sided tape, I started the tapping. I was impressed with how easily it bent over the edges of the template.
It was soon after this point that I decided the double sided tape should be removed or I might never be able to separate the two. I continued to tap my way around the edge, moving the template and metal together. I had no problem forming it over the convex curves.
I thought all was lost when I came to try form it over the points and into the concave of the kidney shape:
But I carried on thinking I'll just keep at it, and before I knew it, the Aluminium had managed to form all around the template and I was able to remove it.
I went inside for a test fit... it fits!
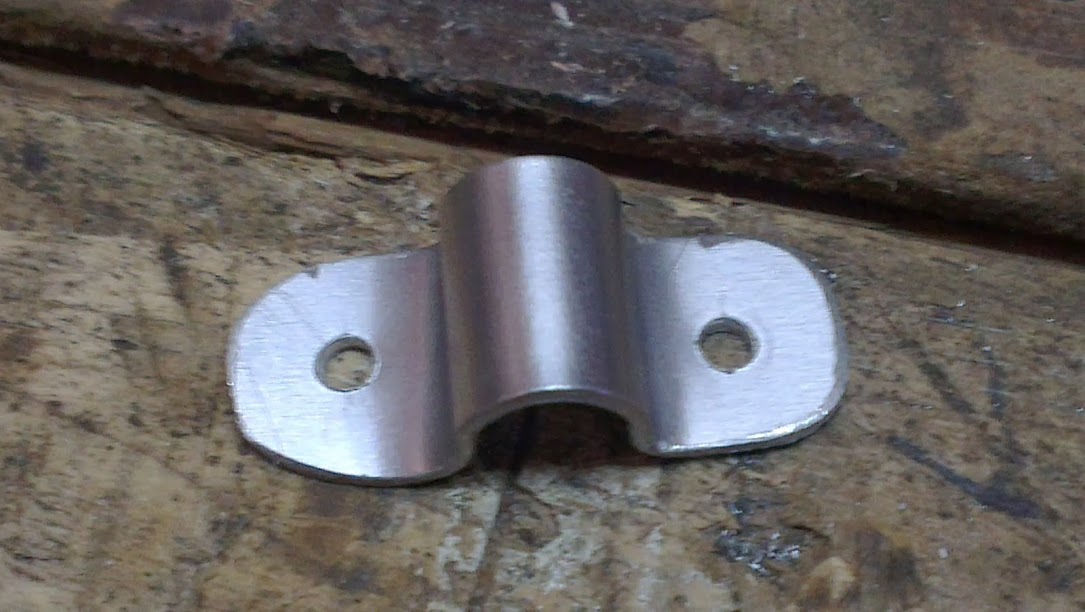
Much thinking was done about the handle. I like Tigger's rubber ring that folds down and makes it flatter when packed. I was going to turn a wooden handle and then thought better of it because it'd always be in the way. I thought I'll try do what he did. So I cut a little piece of Aluminium from the end that was left on the sheet and drilled holes and formed it into a handle holder.
I measured and marked the centre of the lid and drilled holes for the rivets so that the clip would be in the centre.
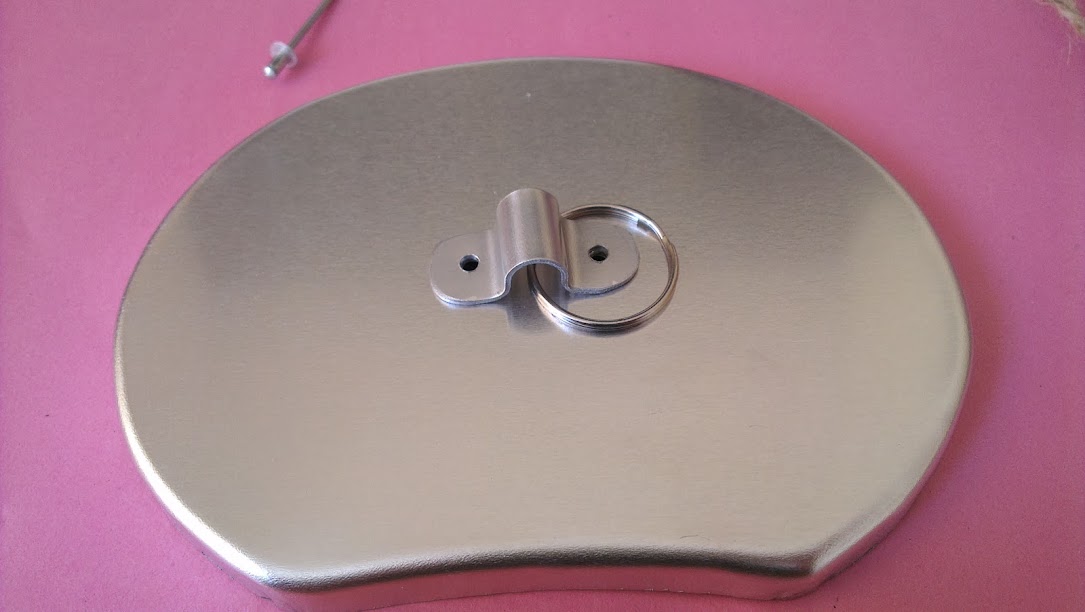
I had to remove the film before riveting and saw the lovely brushed Aluminium under the film. I was contemplating a key ring but it was so tiny that it would be hard to get a hold of when the lid was hot, and it would make a noise.
But I didn't have a nice big O-Ring like Tigger. What to do...
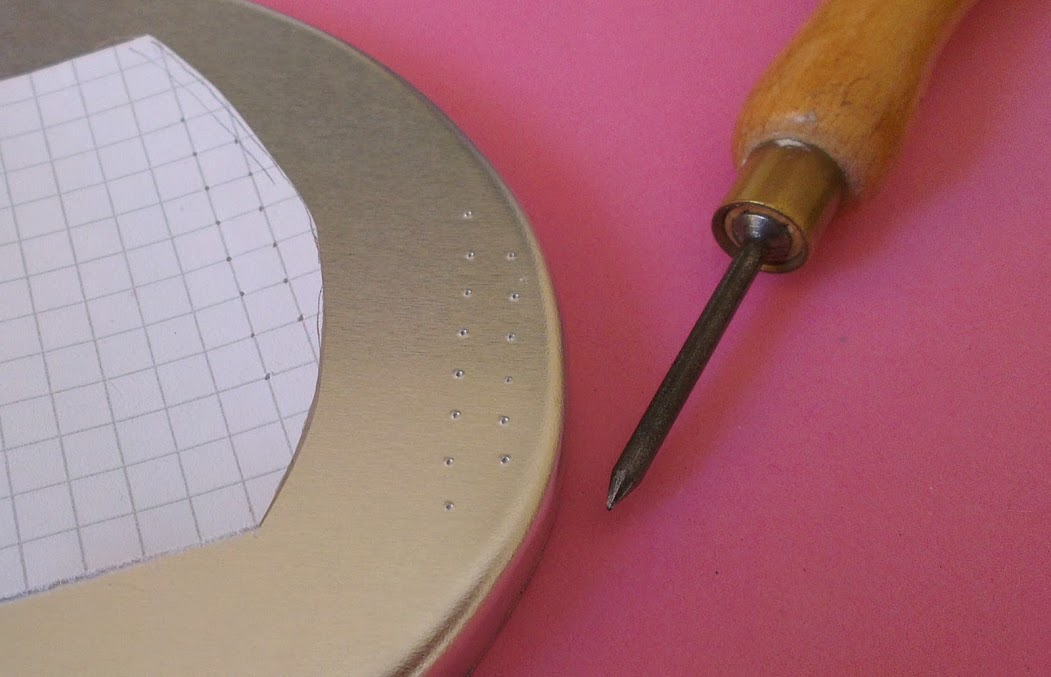
In the mean time I realised I had not drilled the steam/draining holes. With a little help from some graph paper I marked out what I thought would be ample holes.
Off to the drill press again and I drilled these holes with the smallest bit I have. It's around 1mm. I don't want food running out, and water will find it's way through the smallest holes. The drill bit left a few burs which I didn't want to sand away because I'd scratch the nice surface.
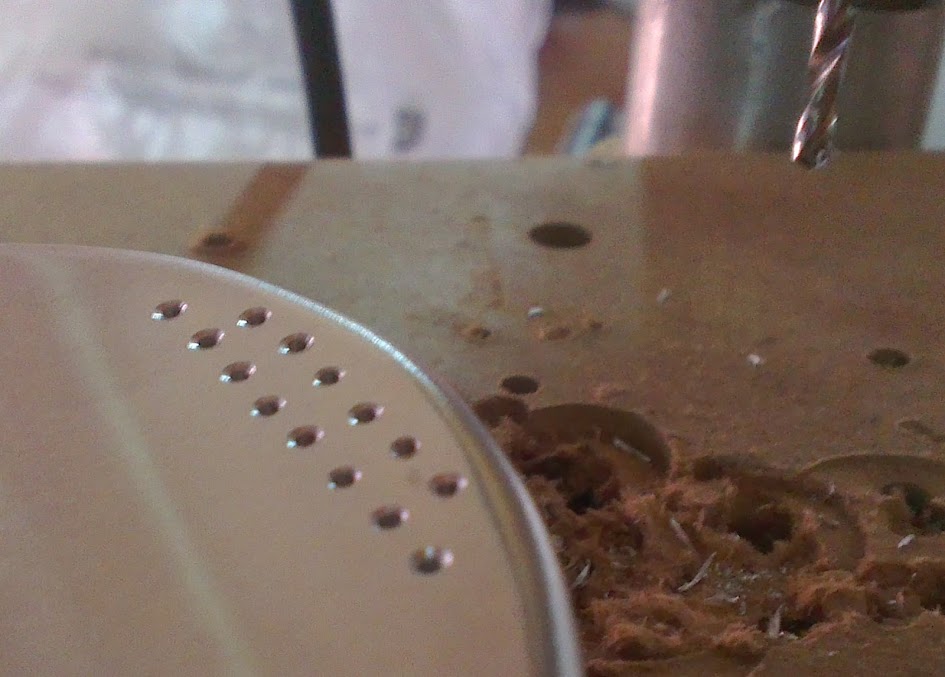
The inside was even worse:
I removed the burs with a 2mm drill bit - this was fiddly work.
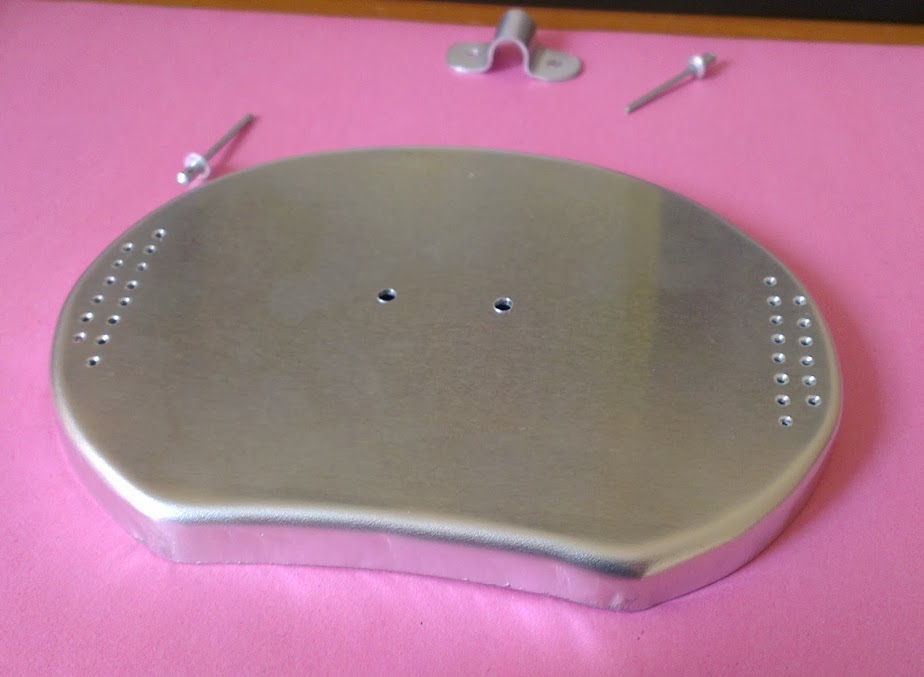
Looks about ready to assemble:
I decided to go with the metal ring after all, but I did a little Macramé with Jute to make it thicker and absort heat and sound. I like it.
Two quick rivets later, the lid was officially finished.
My sincere thanks to Tigger for his idea and instructions. This was a cheap and fun little project that'll help cook my noodles more quickly and keep my food warm on cold days out.


 Reply With Quote


 , you are selling yourself short mate,
  Campfires are best shared with friends.


