Page 1 of 4 1234 LastLast
Results 1 to 10 of 38

Thread: Mini Aluminium Bottle Alcohol Stove (pic heavy)

  1. #1
    Moderator Adam Savage's Avatar
    Join Date
    Mar 2011
    Location
    Northants
    Posts
    4,697

    Mini Aluminium Bottle Alcohol Stove (pic heavy)

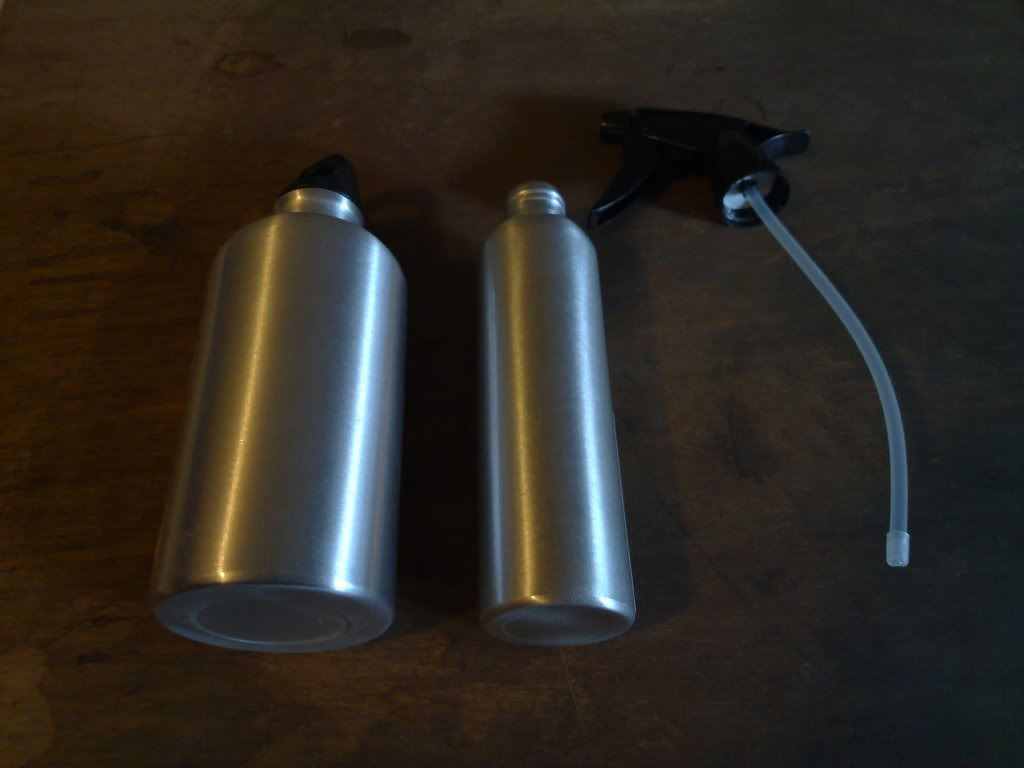
    I noticed some aluminium bottled, pump spray applicators, in Poundland, so decided to make a miniature version of the good old aluminium bottle alcohol stove.

    The bottles are pretty much the same design, but around half the diameter.


    Here are the steps, for those no aware of the process.

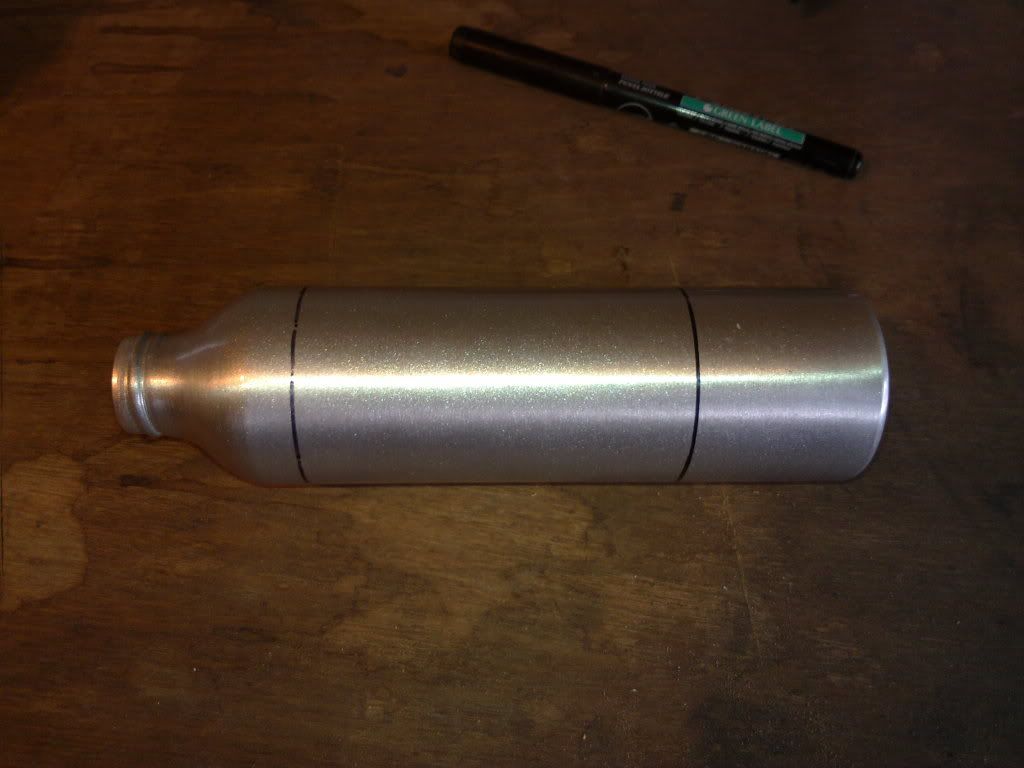
    1: Mark the bottle at the top and bottom, the same distance from each end.


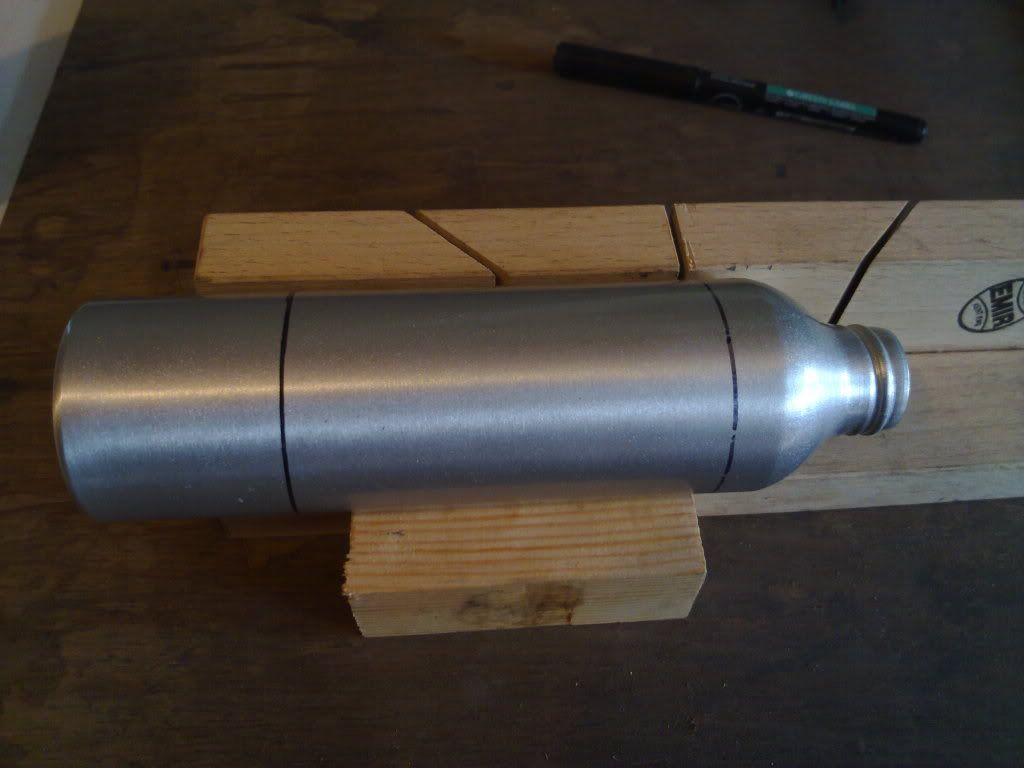
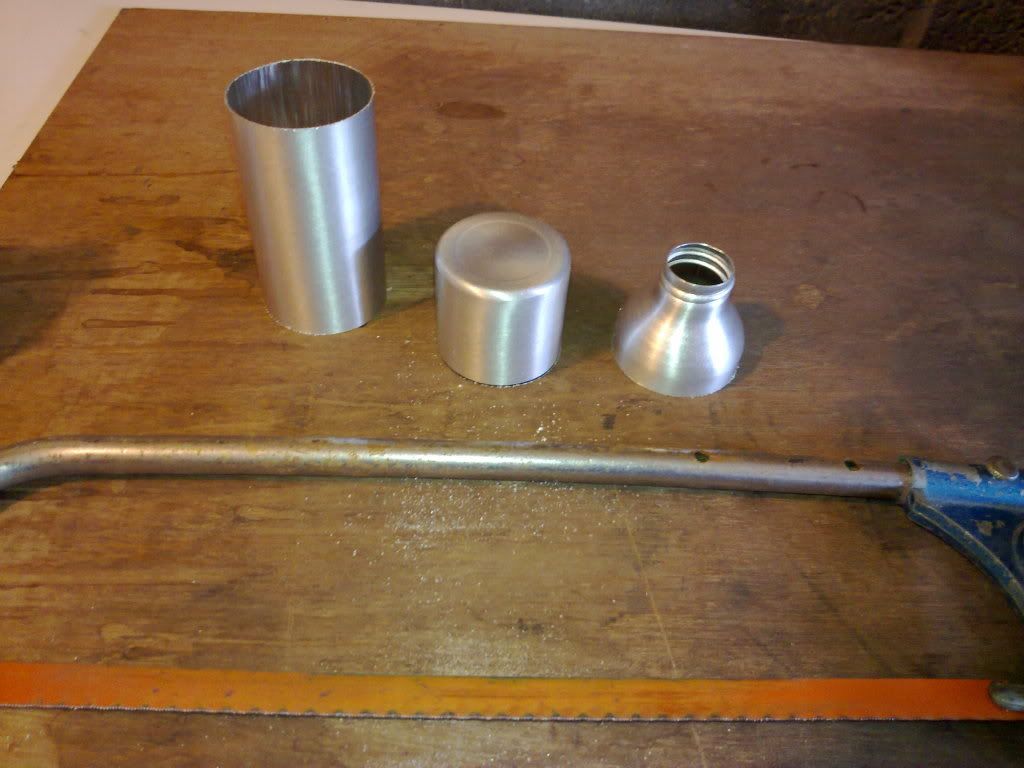
    2: Cut the bottle into three pieces, along these two lines. It's easier if you use a mitre block, to help keep the cuts straight.


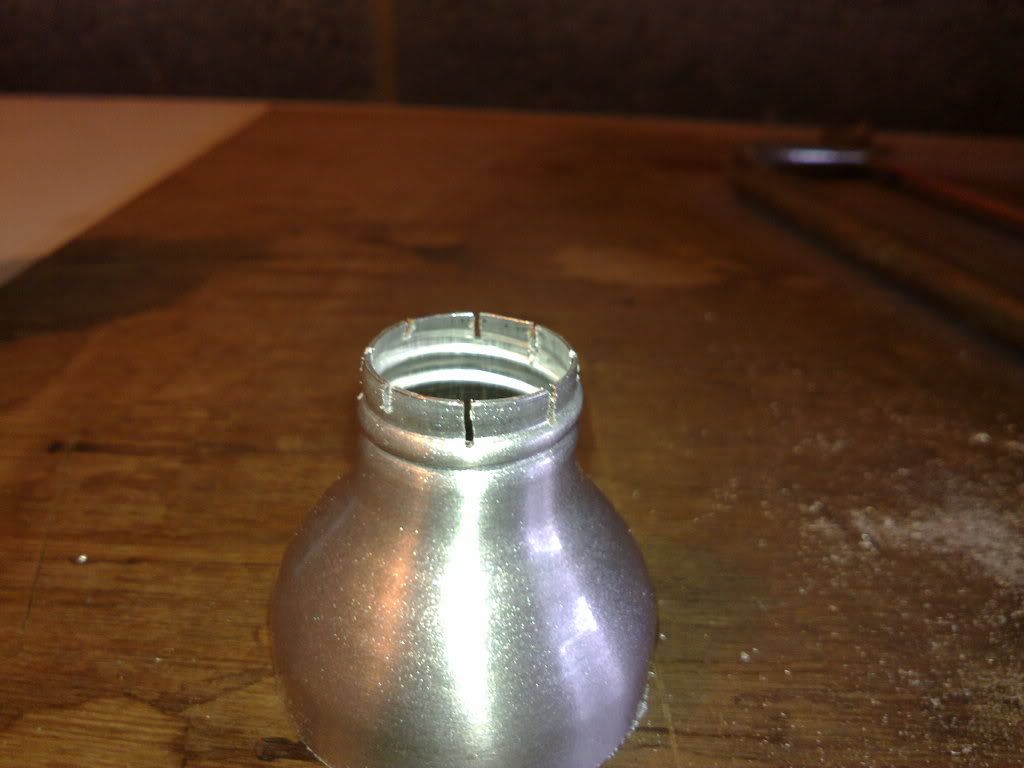
    3: Make four cuts, across the mouth of what used to be the top, of the bottle. This creates 8 small notches, that allow the fuel to pass into the pressure chamber.


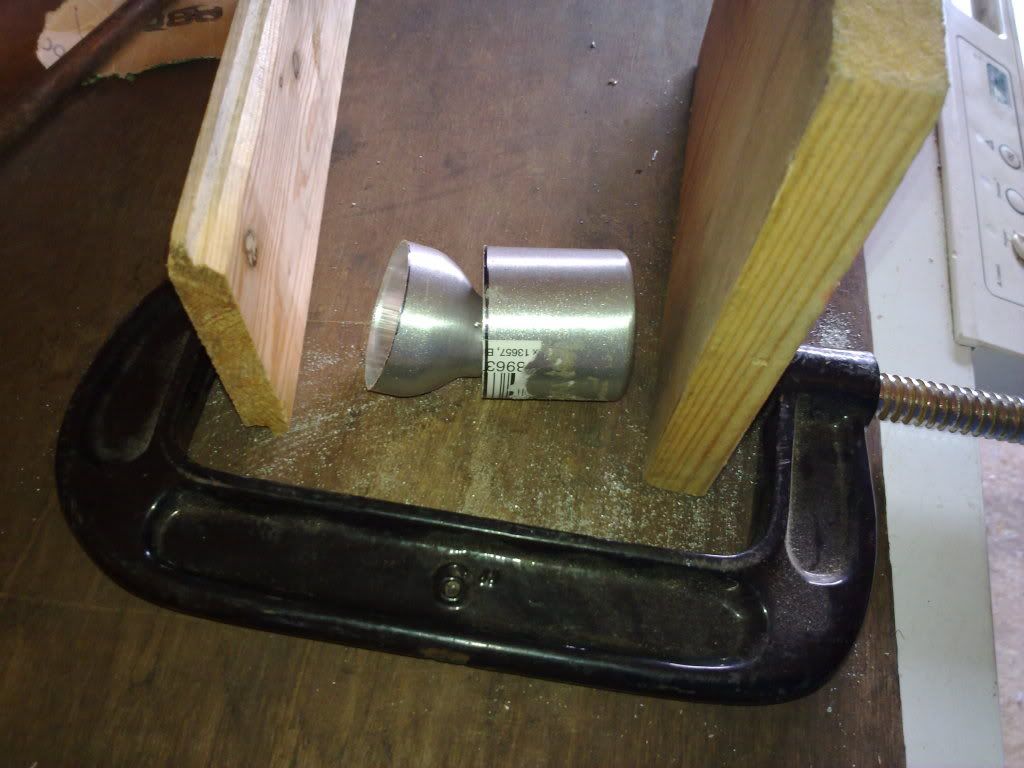
    4: Turn the top section and insert the mouth of the bottle (the narrow end) into the bottom section, like so...


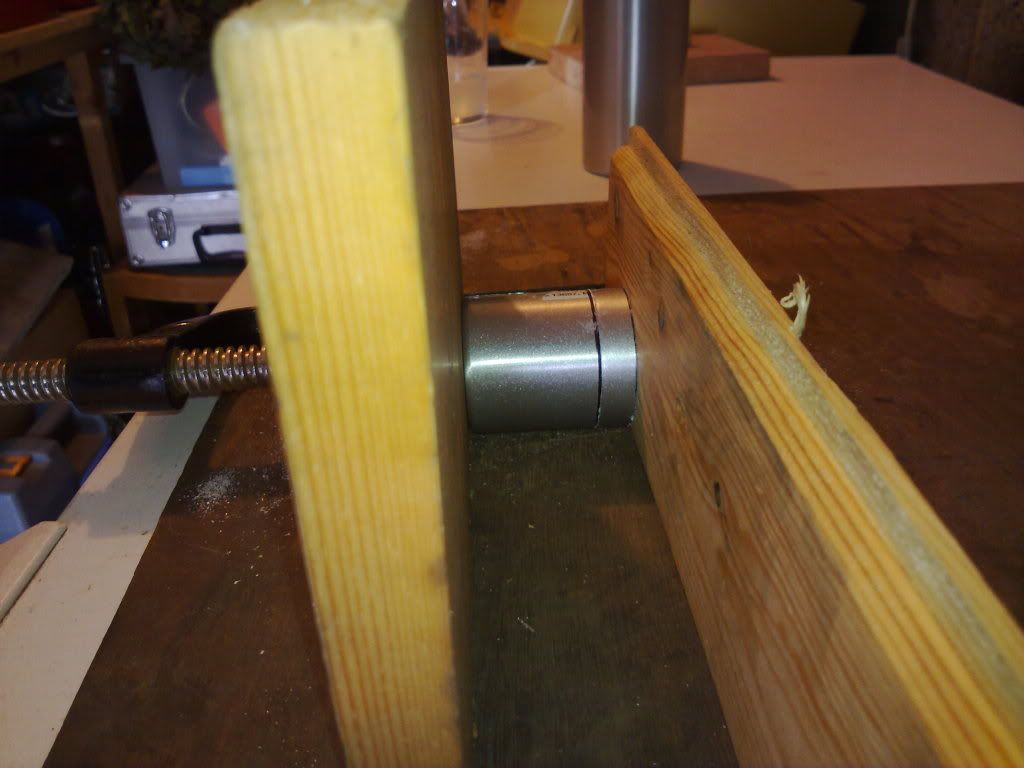
    5: place these sections between two pieces of board, then between the jaws of a large clamp. Make sure the ends are as parallel as possible.


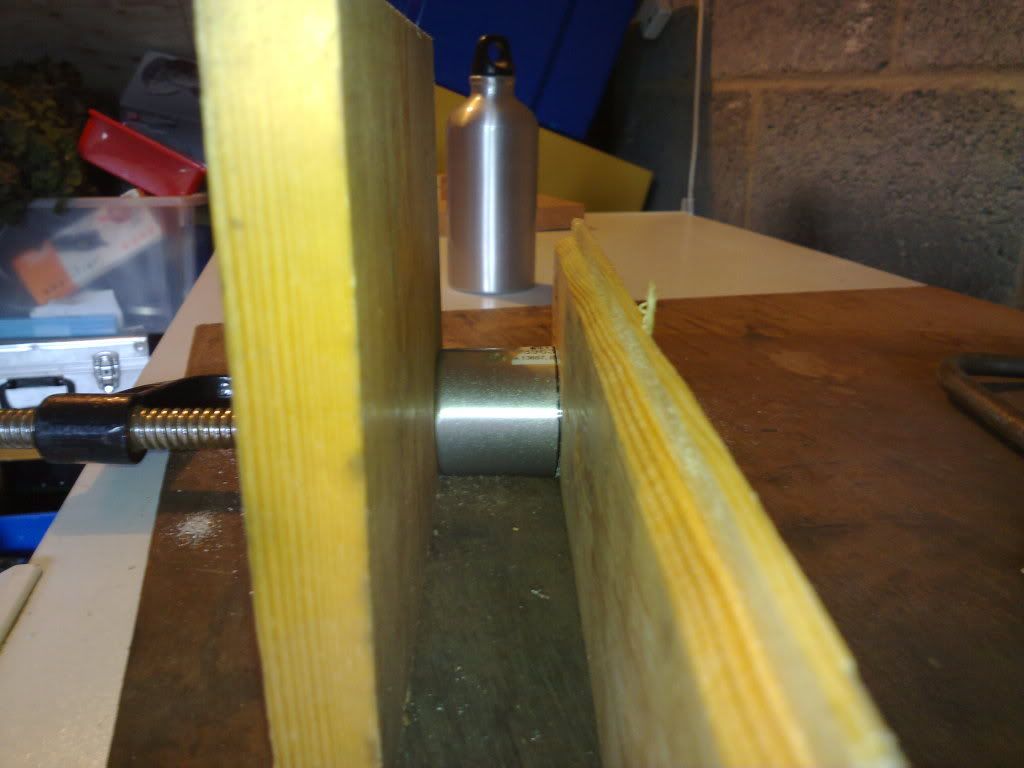
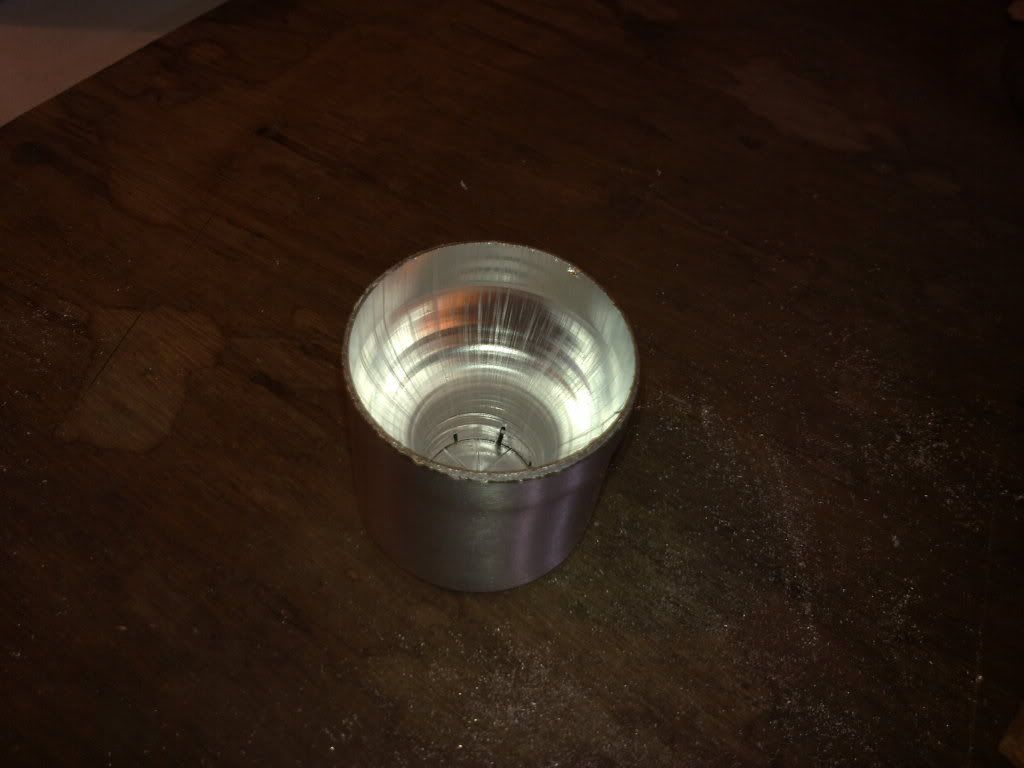
    6: Tighten the clamp, to compress the top section into the bottom section, making sure the boards remain parallel, until the rims of both sections are level.


    -When removed from the clamp, it should look like this...


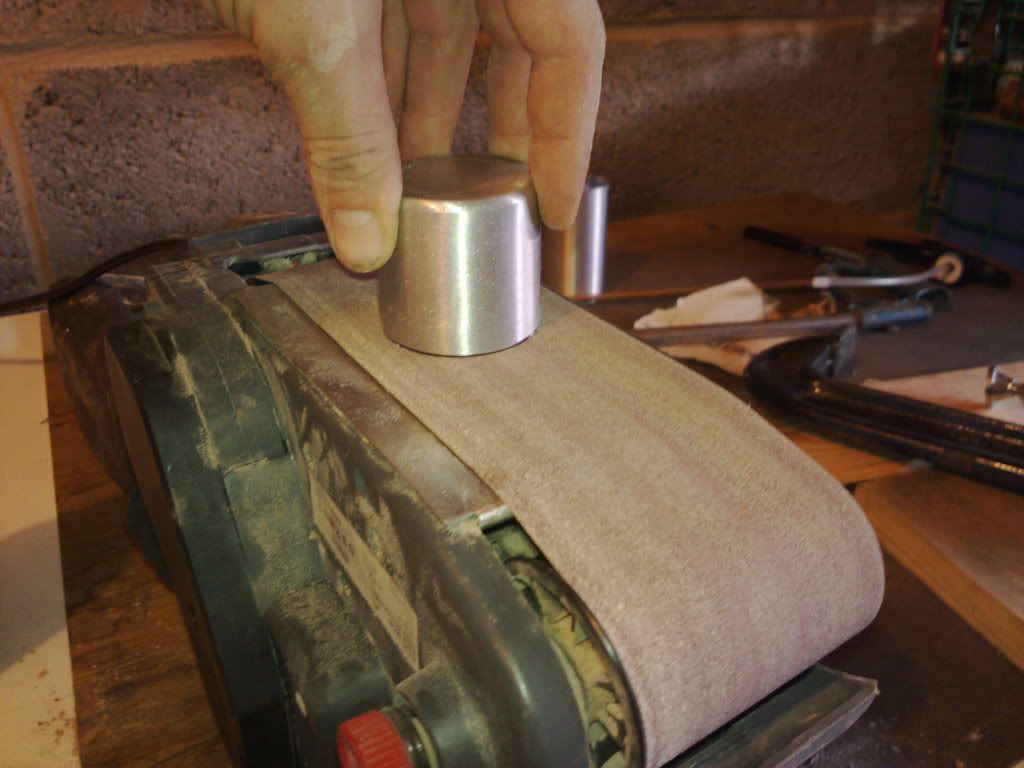
    7: Using an upturned belt sander, smooth the cut edges, to level the (now) top of the stove.


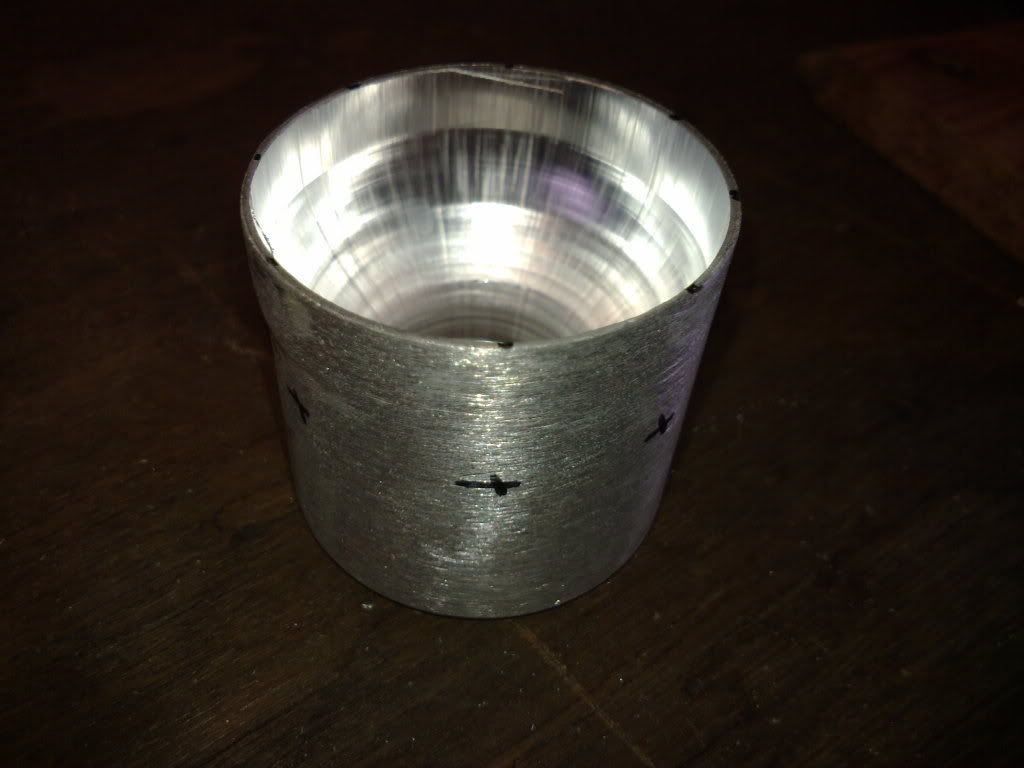
    8: Mark the 8 positions for the jets. Again it's easier if you mark them on the top edge first, then using a block to maintain high, mark around the stove in the corresponding places, then mark an X where the jets will be.


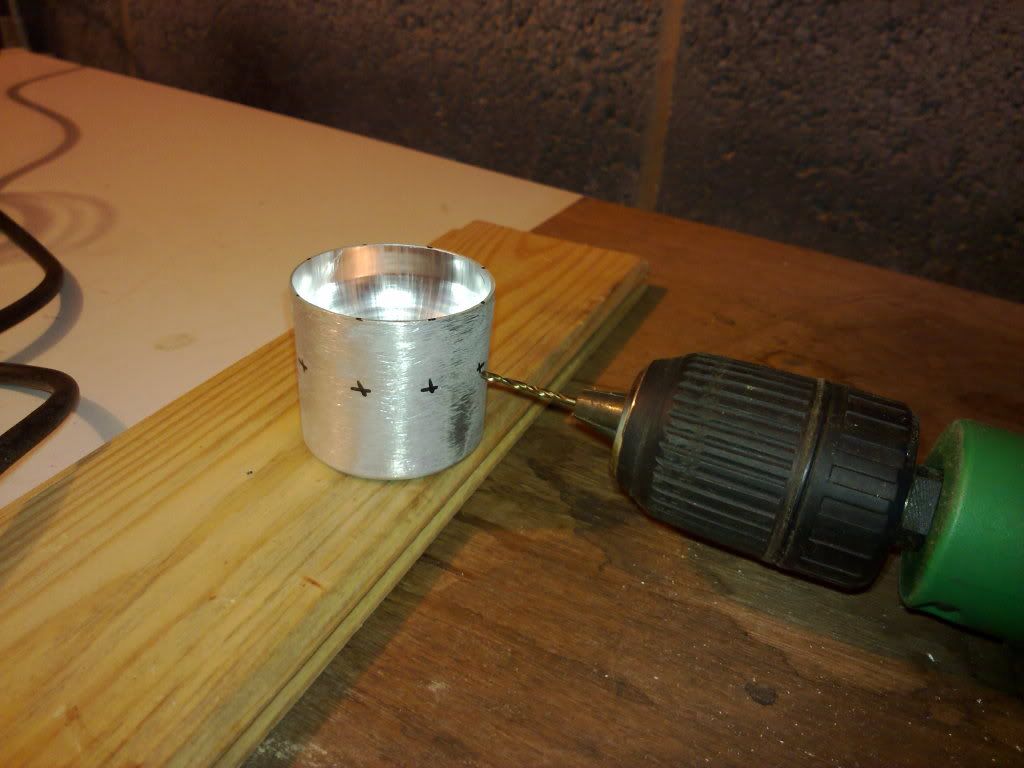
    9: Drill a 2mm hole, at each of these Xs. I found it more controllable, if you lay the drill on it;s side, then "block up" the workpiece to get the correct high.


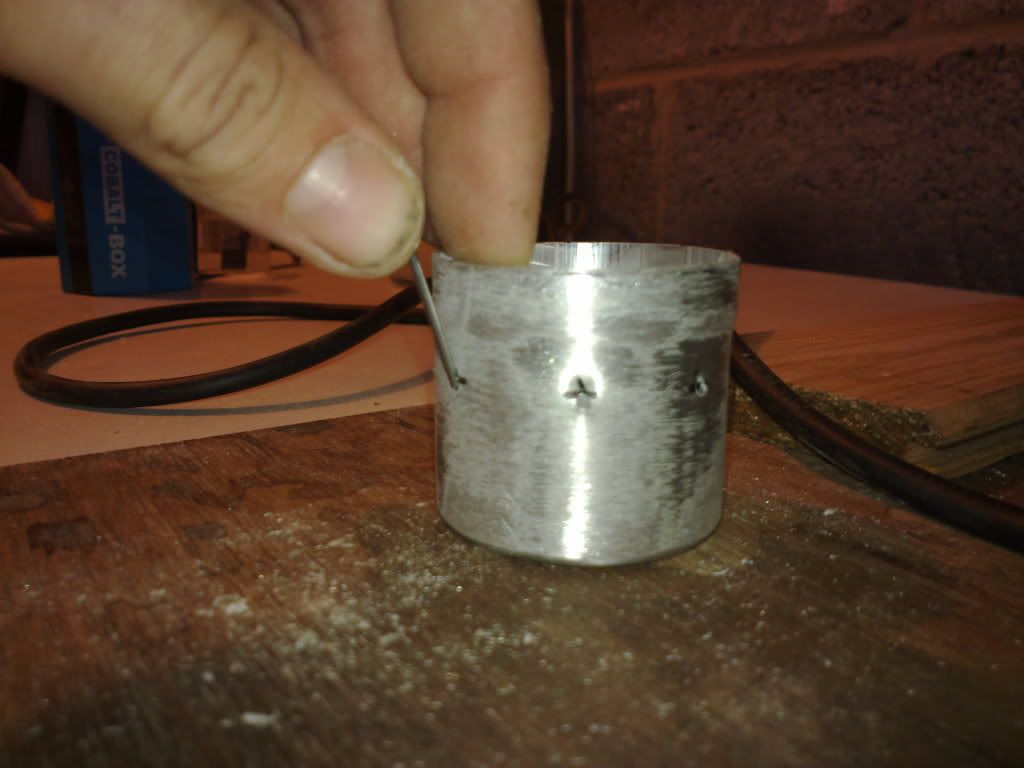
    10: Once the holes have been drilled, use a panel pin to angle the jets upward.


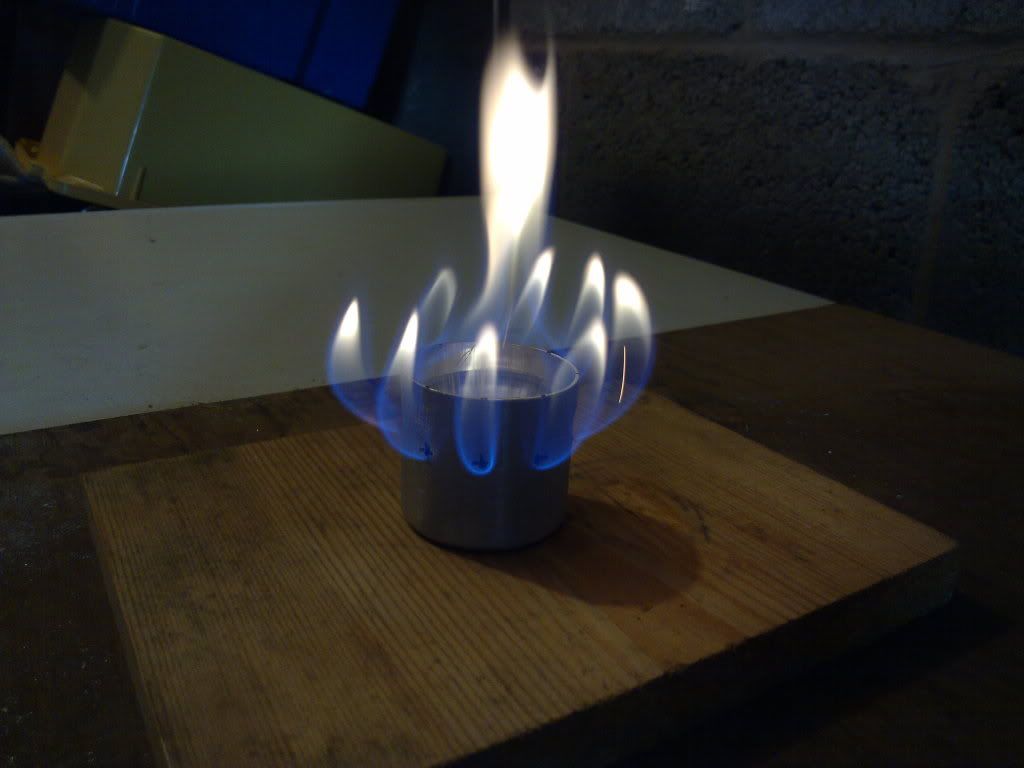
    11: After a little sanding, to smooth any sharp protrusions, you're done. All ready to fill with fuel and get cooking.
    Jack of all trades-Master of none

    Savage Bushcraft YouTube channel

  2. #2
    Native LandRoverMatt's Avatar
    Join Date
    Jun 2011
    Location
    cornwall, Pasty shop
    Posts
    434
    great pictures adam

  3. #3
    Moderator Adam Savage's Avatar
    Join Date
    Mar 2011
    Location
    Northants
    Posts
    4,697
    Thanks Matt
    Jack of all trades-Master of none

    Savage Bushcraft YouTube channel

  4. #4
    Moderator & Poshcrafter™ Martin's Avatar
    Join Date
    Nov 2010
    Location
    Cornwall
    Posts
    3,260
    Thanks Adam, I've really got to make myself one of those.

    Martin
    Sometimes your joy is the source of your smile, but sometimes your smile can be the source of your joy.

  5. #5
    Wanderer Savagewolfrm's Avatar
    Join Date
    Jun 2011
    Location
    Barnstaple North Devon
    Posts
    79
    Someone on here made me one of these and it works a real treat and it's nice a shiny too lol

  6. #6
    Samuel Hearne Bernie's Avatar
    Join Date
    Nov 2010
    Location
    Exmouth, Devon, England, UK
    Posts
    912
    Great post. Thank you, nice clear pictures and steps.

  7. #7
    Native bigzee's Avatar
    Join Date
    Feb 2011
    Location
    Between Lincoln & Boston
    Posts
    448
    Well done Mr. Saint, not only on the miniturization of a good solid design, but of the excellent pictorial representation of what you did. A nice shiny "ali" result without rubbing off paint also. Top marks!
    If you stretch out both arms to represent all time on earth, then with one stroke of a nail file you could eradicate all human history, and 98 per cent of all human history was spent in the stone age.

  8. #8
    Moderator Adam Savage's Avatar
    Join Date
    Mar 2011
    Location
    Northants
    Posts
    4,697
    Quote Originally Posted by Martin View Post
    Thanks Adam, I've really got to make myself one of those.

    Martin
    The normal sized ones are really effective and hold more fuel, but these smaller ones are just as effective, just more suited to lightweight trekking, with minimum space usage. Great for boiling half a litre of water, for a brew.

    Quote Originally Posted by Savagewolfrm View Post
    Someone on here made me one of these and it works a real treat and it's nice a shiny too lol
    You had the bigger brother of this one, so guess you better have tiddler as well. Don't want to break up a family lol. Will hand it over next meet.

    Quote Originally Posted by Bernie View Post
    Great post. Thank you, nice clear pictures and steps.
    You're welcome Bernie, will knock one up for you if you like. I know you like these things. Hope to see you at another meet some time. I believe Ivan is organising one for the first weekend of October, if you're interested

    Quote Originally Posted by bigzee View Post
    Well done Mr. Saint, not only on the miniturization of a good solid design, but of the excellent pictorial representation of what you did. A nice shiny "ali" result without rubbing off paint also. Top marks!
    I normally just rough sand mine. You can just leave them nice and shiny, but after a while the coating (lacquer or whatever it is) goes brown. Not sure it gives off harmful fumes or not, but I expect so lol. Plus I don't mind it looking rough, as long as it works.
    Jack of all trades-Master of none

    Savage Bushcraft YouTube channel

  9. #9
    Trapper Notredame11211's Avatar
    Join Date
    Nov 2010
    Location
    Idaho, USA
    Posts
    189
    Thanks so much Adam
    Best Wishes,
    James

    "Do not look to the ground for you next step; Greatness lies with those who look to the horizon."

  10. #10
    Moderator Adam Savage's Avatar
    Join Date
    Mar 2011
    Location
    Northants
    Posts
    4,697
    Don't mention it buddy.
    Jack of all trades-Master of none

    Savage Bushcraft YouTube channel

Posting Permissions

  • You may not post new threads
  • You may not post replies
  • You may not post attachments
  • You may not edit your posts
  •